
GraphQL Sorting: A Beginner's Guide
Sorting data in GraphQL is a powerful tool that enhances the usability and performance of your applicatio ...
Learn more

GraphQL is gaining wider adoption day by day as a powerful tool for building APIs. It addresses many shortcomings of prevalent solutions like REST while providing strengths through its unique philosophy of modeling application data more effectively.
Our brains are very good at visualizing and establishing relationships and patterns to extract valuable information. GraphQL plays very nicely with this cognitive model. It enables us to apply this model to our application data by defining these relationships. This allows us to more easily encapsulate the interconnectedness of various entities.
In this article, our aim is to make a backend that can be used to power an Instagram clone application. We’ll start simple and small in order to build up some core principles of data modeling and how to do so within Dgraph Cloud. At end of this article, you’ll have a good understanding of the following topics:
Modeling and describing application data using a GraphQL schema.
Performing different GraphQL operations that simulate application behaviors:
The beauty of doing GraphQL, more so on the Dgraph platform, is that you can iterate faster. You can get your ideas out there fast, roll out new features, test, and deploy effortlessly. All of this can be done without worrying about configuring the backend infrastructure. This also cuts out common GraphQL implementation tasks like going through the grunt work of setting up GraphQL servers, resolvers, and so on. You spend more time with your ideas and developing your core application. This gives you a pleasant developer experience, and in turn, a robust and pragmatic product cycle.
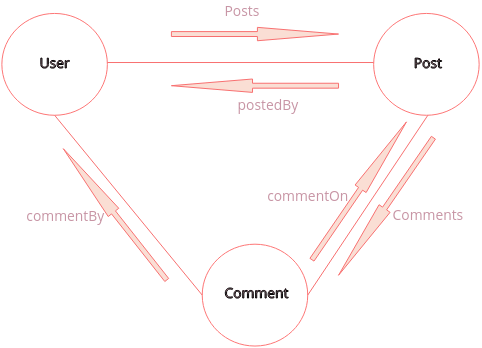
Our Instagram clone is going to be a fairly stripped-down version with two main data entities: users and photos.
Each user’s feed will contain posts by the users they’re following. Let’s look at such a post and try to pinpoint its different elements:

We can take the following notes on the basic understanding we have for now on the application data:
Keeping this functionality in mind, we can now start writing the GraphQL schema. The schema will consist of three types: User, Post, and Comment. These fields will correspond to the observations we’ve just made. We’ll also assume that all the images within the app reside in an external resource.
The following graph diagram can help you better understand the relationships each type has with one another:
Below is the User type:
type User {
  username: String! @id
  name: String!
  about: String
  email: String!
  avatarImageURL: String!
  posts: [Post!] @hasInverse(field: postedBy)
  following: Int!
  follower: Int!
}
Like in Instagram, the username will act as a unique identifier for each user. We enforce that by using the @id directive.
The @hasInverse directive establishes a bidirectional edge between a user object and a post object. A user can have more than one post, and we’d like to be able to access their data when we’re traversing User nodes in our data graph.
Conversely, multiple posts can have a single author. In those cases, we’d also like an option of being able to query about their authors too. You can easily see the type of relationship these two types have with each other; we want to define that relationship in our schema and the ability to traverse from both direction.
We can achieve all this by supplying the directive with an argument that specifies the respective field of the Post type, i.e. postedBy.
The post type looks like the following:
type Post {
  id: ID!
  postedBy: User!
  imageURL: String!
  description: String
  likes: Int!
  comments: [Comment!] @hasInverse(field: commentOn)
}
We tell Dgraph to generate a unique identifier for each post by using the built-in scalar type ID.
The same kind of relationship exists between a Post and Comment object. Hence just like users and their posts, we’ve established a bidirectional edge between post and comment objects by using the @hasInverse directive.
Lastly, the Comment type:
type Comment {
  id: ID!
  text: String!
  commentBy: User!
  commentOn: Post!
}
With our schema set, it’s time to deploy it using Dgraph Cloud. Once deployed, Dgraph creates a fully functional GraphQL API and graph database that can handle all requests coming in from the client.
We won’t build any UI this time, instead, we’ll use an API client like Insomnia or Postman to simulate sending requests from a client to the GraphQL API and see if we can get enough data to render a useful UI. Dgraph Cloud prepares your server side in mere minutes. From there your efforts can go into building the client with your framework of choice like React, Vue, or any other one. that interacts with the API using a GraphQL client like Apollo or urql.
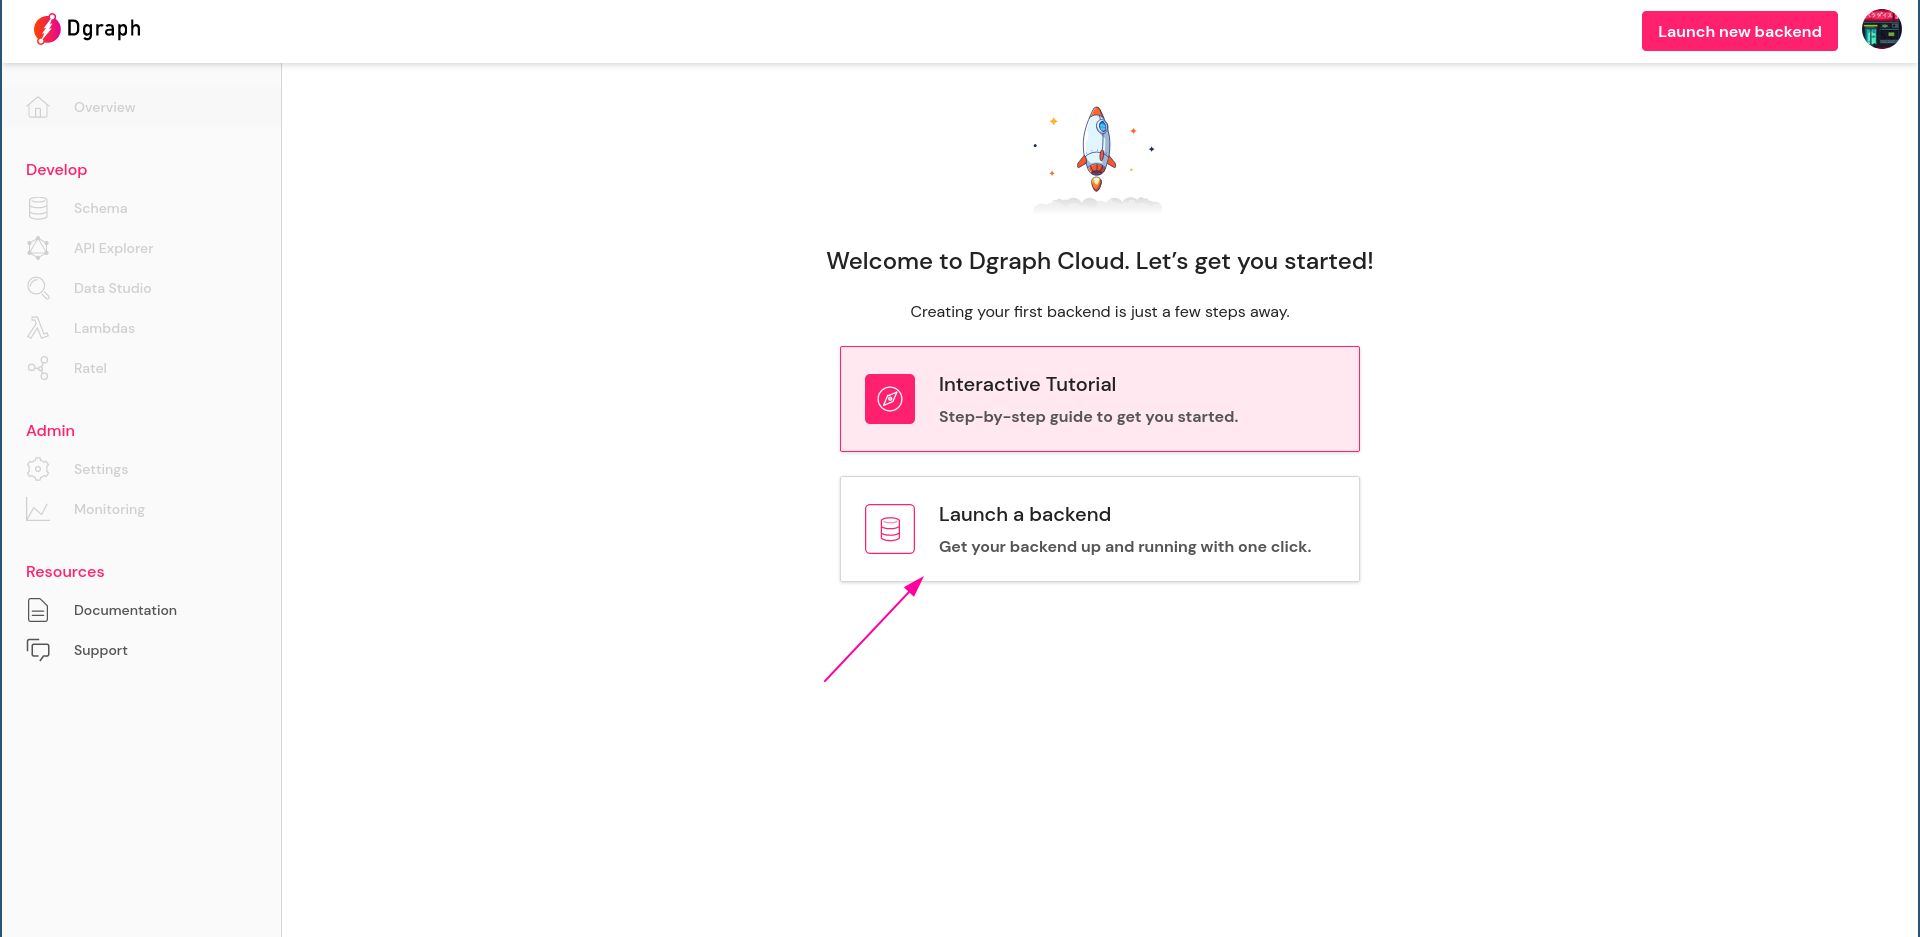
If you haven’t signed up already, head over to the signup page and register. Then click on Launch a Backend.
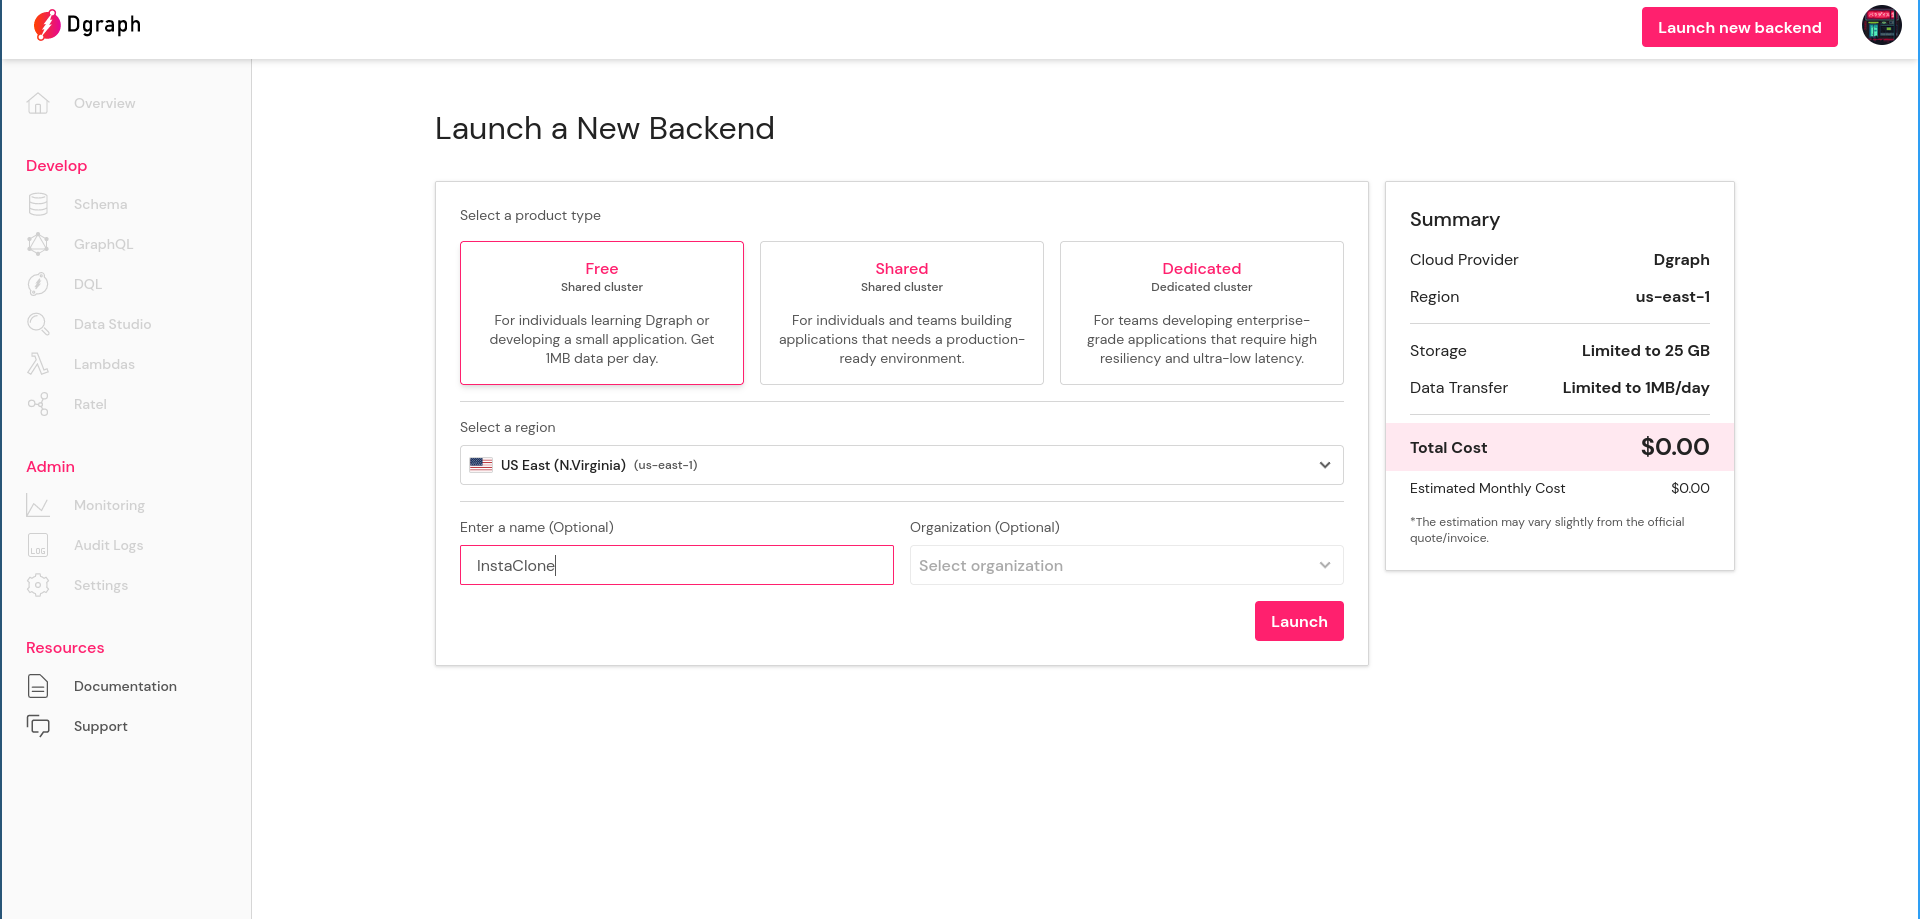
In the next window, select the Free tier to get started. Give your backend a name and click Launch.
It’ll take a few seconds to spin up. You’ll see a dashboard soon with details of your backend, including the API endpoint where all the GraphQL requests would go.
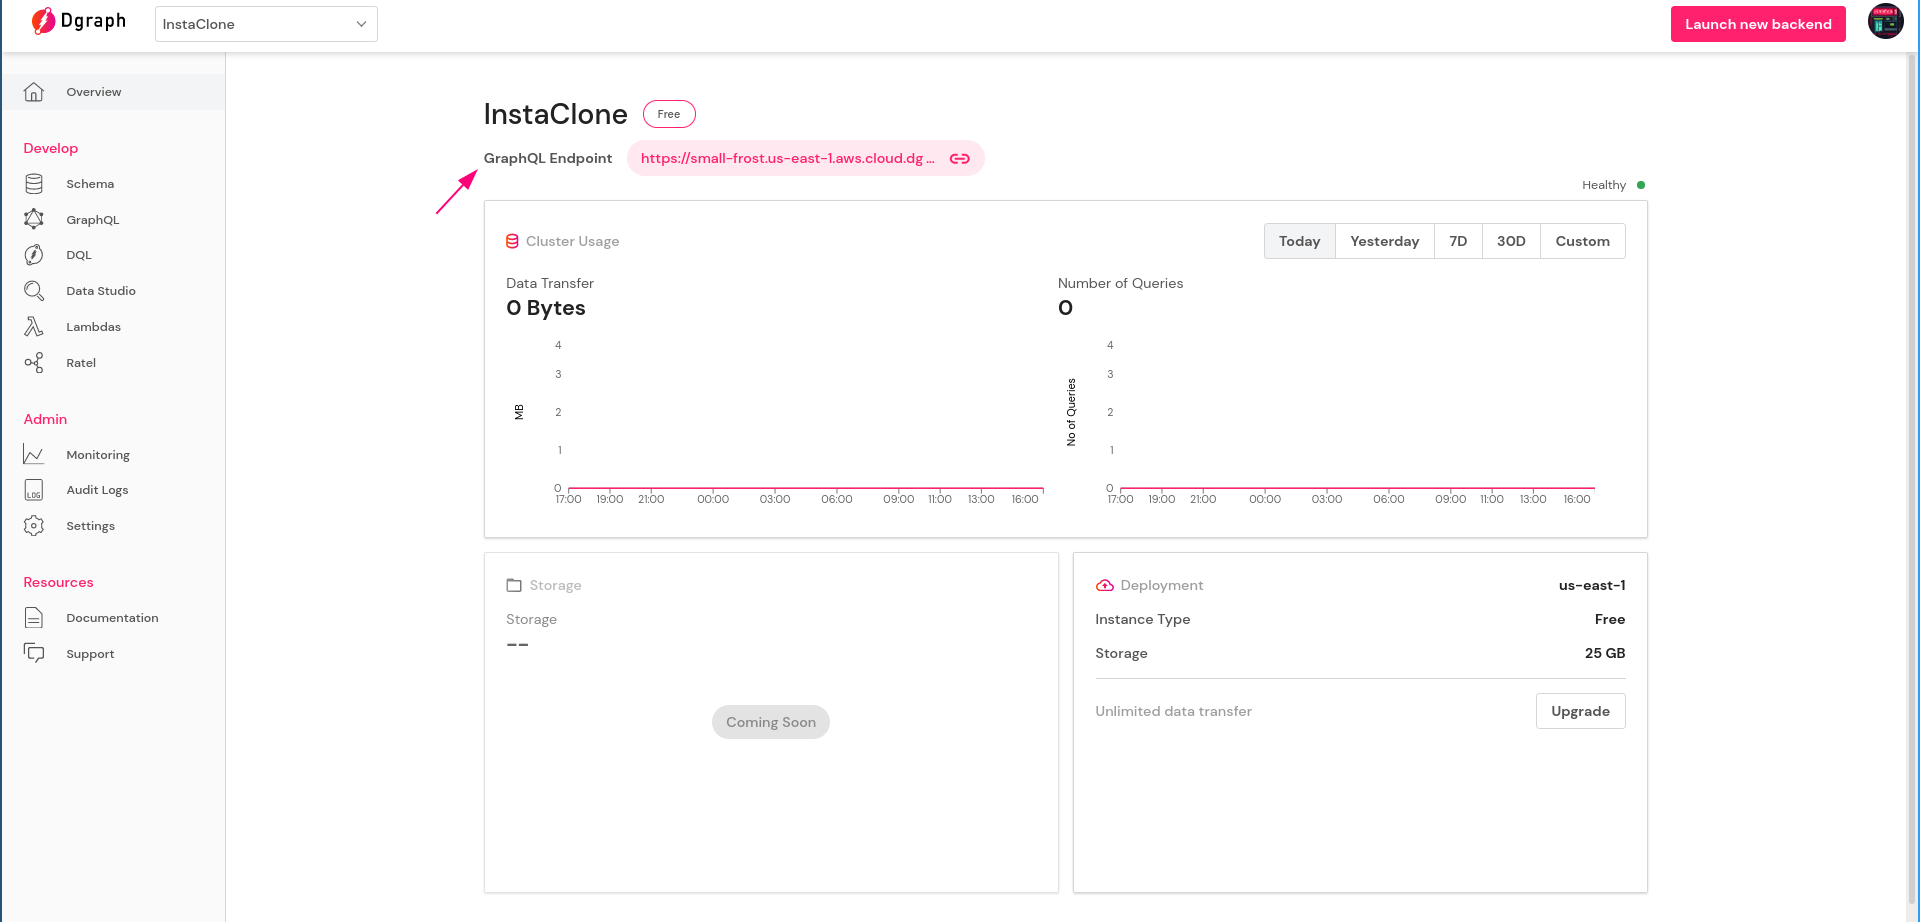
Click on the Schema from the left sidebar and paste the schema we just prepared:
type User {
  username: String! @id
  name: String!
  about: String
  email: String!
  avatarImageURL: String!
  posts: [Post!] @hasInverse(field: postedBy)
  following: Int!
  follower: Int!
}

type Post {
  id: ID!
  postedBy: User!
  imageURL: String!
  description: String
  likes: Int!
  comments: [Comment!] @hasInverse(field: commentOn)
}

type Comment {
  id: ID!
  text: String!
  commentBy: User!
  commentOn: Post!
}
Then click on Deploy.
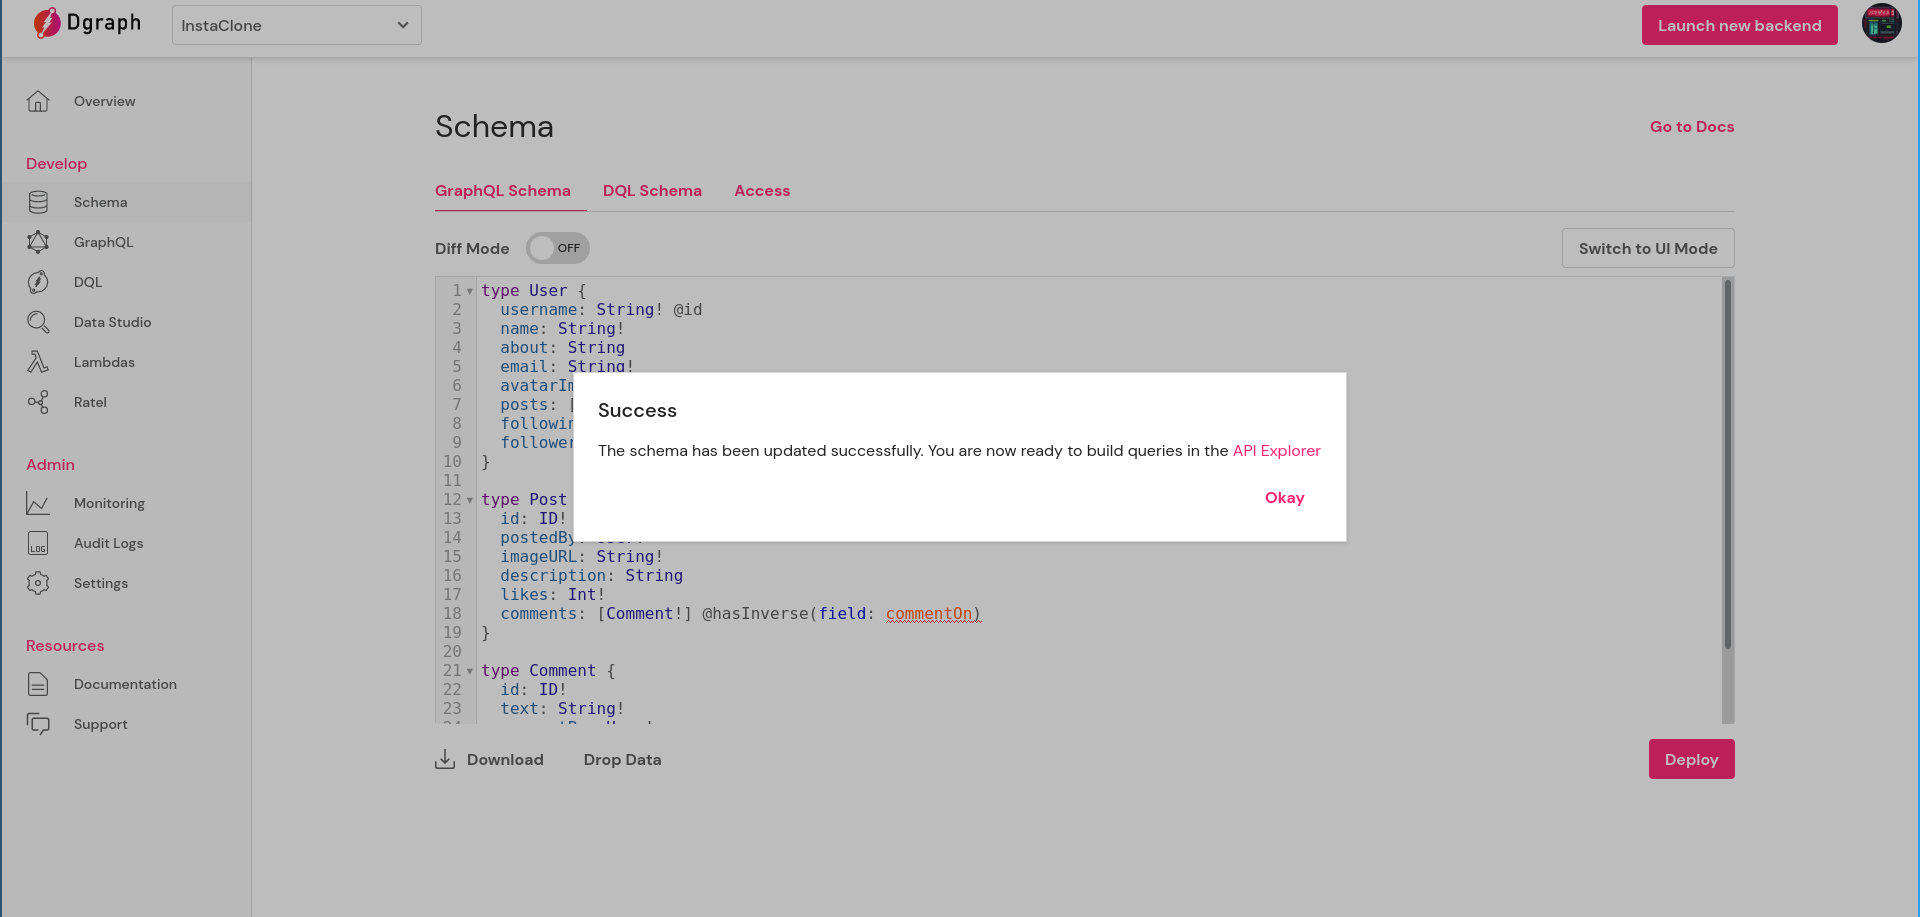
That’s all there’s to it. The GraphQL API is ready to consume requests and return appropriate responses.
We can now start exploring application functions that’ll be triggered by different in-app operations.
First, we’ll populate the database with some mock data. This will simulate getting the first couple of users for your application and give us some data to play with. As they start using the app, users start posting photos and comments. In a real-world GraphQL application, actions like posting a photo, writing a comment, or liking a photo will create new data in the database. The data will be stored according to the types we created in the application’s schema.
When we create, update, or delete data in GraphQL, we do so by sending a mutation request to the API. The data within the request exactly is then used by the backend to do the operation requested.
For example, consider the following chain of events:
mutation request to the remote API containing those credentials.mutation operation corresponding to the Post type that adds it to the database, with some data for the description field.likes field of that post would be increased by one. This is not adding new data but rather updating or modifying a part of it.comment corresponds to the Comment type and there’ll be a mutation request to the API with necessary data adding that comment.The front-end of your app will have mechanisms set up to track these events (for example when you press the like button on a post), and based on the type of event, it’ll send a suitable GraphQL request to the server.
You don’t have to leave your Cloud dashboard and open another application to interact with your API; there’s a rich set of tools already available for that so you can start experimenting without leaving your browser.
Let’s add some users with some mock data. Follow the below steps:
addUser mutation from there, or paste the following mutation request:mutation AddSomeUsers($userInput: [AddUserInput!]!) {
addUser(input: $userInput) {
user {
username
name
email
}
}
}
With the following JSON as the userInput query variable:
{
  "userInput": [
    {
        "username": "kmulbery0",
        "name": "Kimberlee Mulbery",
        "email": "[email protected]",
        "about": "Art, cinema and books.",
        "avatarImageURL": "https://robohash.org/voluptatibussapientein.png?size=50x50&set=set1",
        "following": 41,
      	"follower": 20
    },
    {
        "username": "foakes",
        "name": "Francis Oakes",
        "email": "[email protected]",
        "avatarImageURL": "https://robohash.org/namilloipsam.png?size=50x50&set=set1",
        "following": 69,
      	"follower": 40
    },
    {
        "username": "docahill2",
        "name": "Danny O'Cahill",
        "email": "[email protected]",
        "about": "Welcome to my digital album!",
        "avatarImageURL": "https://robohash.org/quiofficiispraesentium.png?size=50x50&set=set1",
        "following": 4,
      	"follower": 10
    },
    {
        "username": "karen",
        "name": "Karen Gillian",
        "email": "[email protected]",
        "about": "21st century polymath",
        "avatarImageURL": "https://robohash.org/fugitetautem.png?size=50x50&set=set1",
        "following": 60,
      	"follower": 22
    },
    {
        "username": "adury4",
        "name": "Anna-diane Dury",
        "email": "[email protected]",
        "avatarImageURL": "https://robohash.org/impediteaet.png?size=50x50&set=set1",
        "following": 41,
      	"follower": 100
    },
    {
        "username": "rkemwall5",
        "name": "Killian Rourke",
        "email": "[email protected]",
        "avatarImageURL": "https://robohash.org/etenimdeleniti.png?size=50x50&set=set1",
        "following": 67,
      	"follower": 180
    },
    {
        "username": "cparramore6",
        "name": "Cirilo Parramore",
        "email": "[email protected]",
        "about": "Food lover and critique.",
        "avatarImageURL": "https://robohash.org/inventorefacilisfugiat.png?size=50x50&set=set1",
        "following": 75,
      	"follower": 100
    },
    {
        "username": "ff8",
        "name": "Raymond Ferdinand",
        "email": "[email protected]",
        "about": "Freelance artist",
        "avatarImageURL": "https://robohash.org/ipsambeataeest.png?size=50x50&set=set1",
        "following": 1022,
      	"follower": 13000
    },
    {
        "username": "shaw",
        "name": "Sebastian Shaw",
        "email": "[email protected]",
        "about": "Writer of useless things.",
        "avatarImageURL": "https://robohash.org/illumsintvoluptas.png?size=50x50&set=set1",
        "following": 6,
      	"follower": 11
    }
  ]
}
addUser mutation to invoke the operation. We optionally have named it AddSomeUser, but you can exclude that if you want. It’s good practice to separate the mutation data into a query variable when the data is large, as we’ve done here with the userInput variable. It keeps the main query body clear and readable.id, username, name, and email fields of each new user, just as you specified in the mutation request. This proves that the mutation operation was a success and the data now resides in the remote server.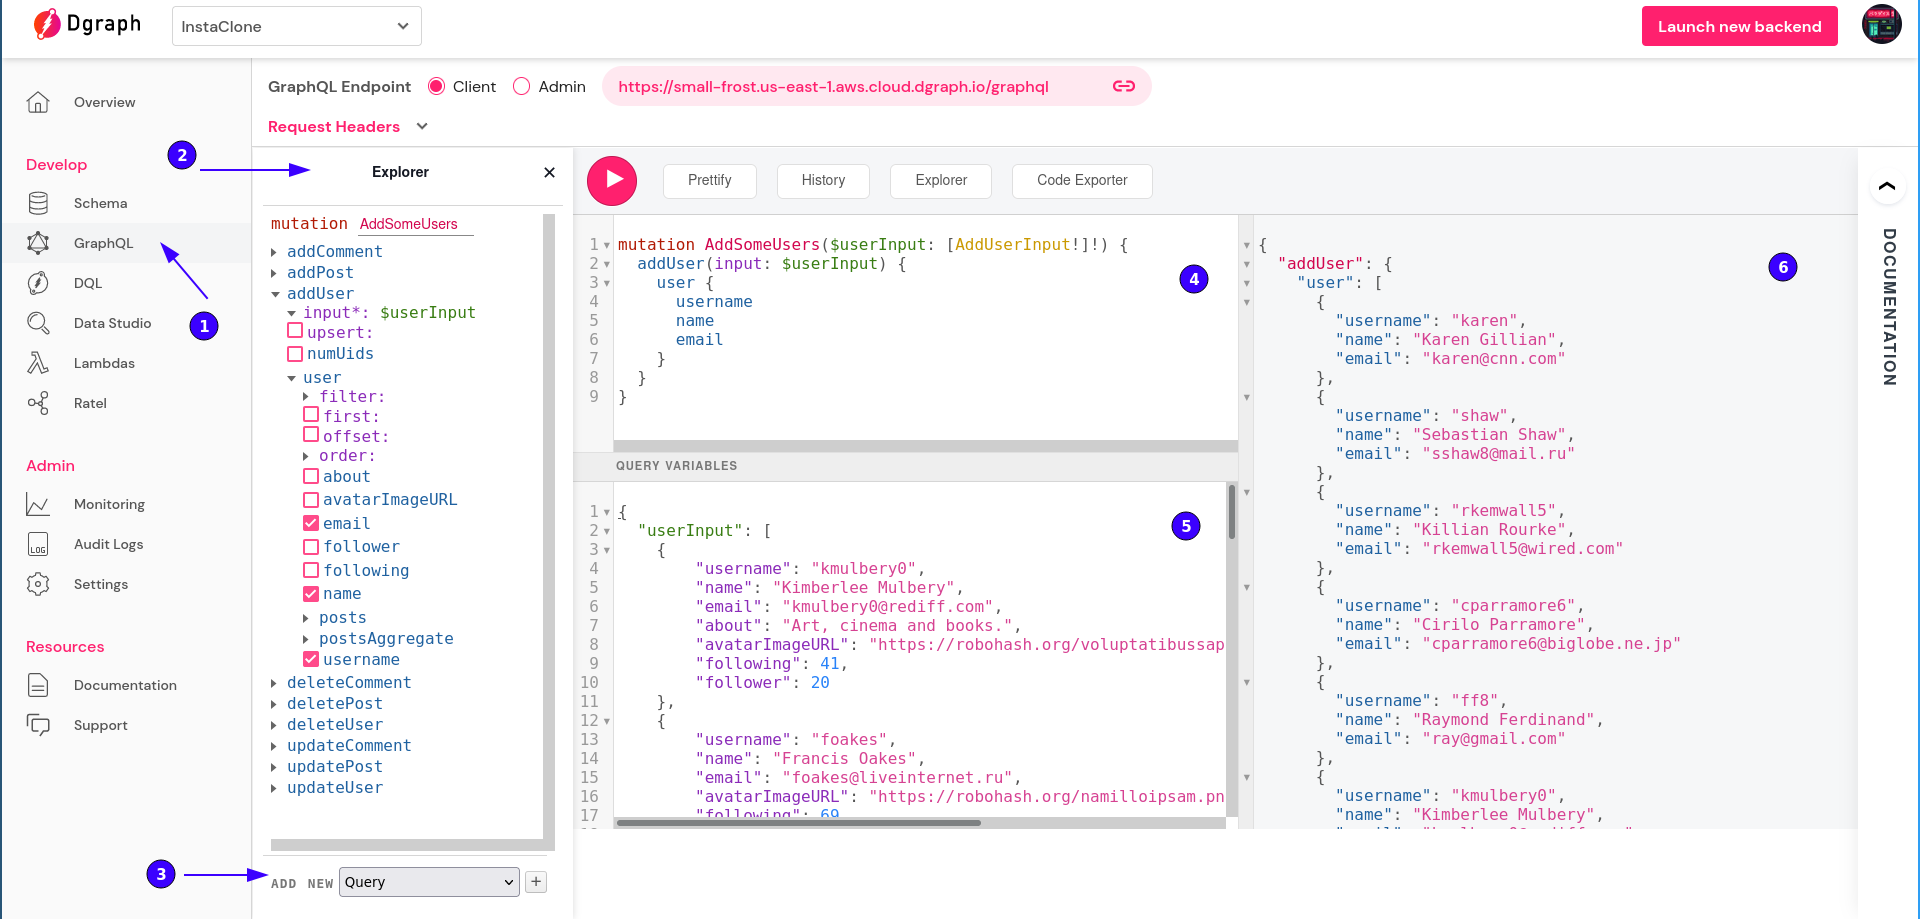
Realistically speaking, new users shouldn’t have any follower counts! But for simplicity’s sake let’s assume that after installing the app they started following some default accounts that the app suggested.
So some users have installed the app on their devices and they’re likely to start posting. So let’s simulate that! As you can probably guess, it’s going to an addPost type mutation:
mutation AddSomePosts($postInput: [AddPostInput!]!) {
  addPost(input: $postInput) {
    post {
      id
      description
      imageURL
    }
  }
}
With query variable as:
{
    "postInput": [
        {
            "postedBy": {
                "username": "karen"
            },
            "description": "A new antique book I just collected!",
            "likes": 0,
            "imageURL": "http://dummyimage.com/107x100.png/ff4444/ffffff"
        },
        {
            "postedBy": {
                "username": "kmulbery0"
            },
            "description": "Some amazing shots from the film Drive (2011)",
            "likes": 0,
            "imageURL": "http://dummyimage.com/138x100.png/5fa2dd/ffffff"
        },
        {
            "postedBy": {
                "username": "foakes"
            },
            "description": "We went on a hike!",
            "likes": 0,
            "imageURL": "http://dummyimage.com/103x100.png/ff4444/ffffff"
        },
        {
            "postedBy": {
                "username": "docahill2"
            },
            "description": "Minnie likes the sunny day today. Just look at her!",
            "likes": 0,
            "imageURL": "http://dummyimage.com/247x100.png/5fa2dd/ffffff"
        },
        {
            "postedBy": {
                "username": "adury4"
            },
            "likes": 0,
            "imageURL": "http://dummyimage.com/107x100.png/cc0000/ffffff"
        },
        {
            "postedBy": {
                "username": "rkemwall5"
            },
            "description": "Workout time...",
            "likes": 0,
            "imageURL": "http://dummyimage.com/194x100.png/5fa2dd/ffffff"
        },
        {
            "postedBy": {
                "username": "cparramore6"
            },
            "description": "Will come back here just for this burger.",
            "likes": 0,
            "imageURL": "http://dummyimage.com/161x100.png/cc0000/ffffff"
        },
        {
            "postedBy": {
                "username": "ff8"
            },
            "description": "My new concept art. Please share!",
            "likes": 0,
            "imageURL": "http://dummyimage.com/179x100.png/5fa2dd/ffffff"
        },
        {
            "postedBy": {
                "username": "shaw"
            },
            "description": "Cover photo of my book that's hitting the shelves in September!",
            "likes": 0,
            "imageURL": "http://dummyimage.com/220x100.png/dddddd/000000"
        }
    ]
}
You should get a successful response back:
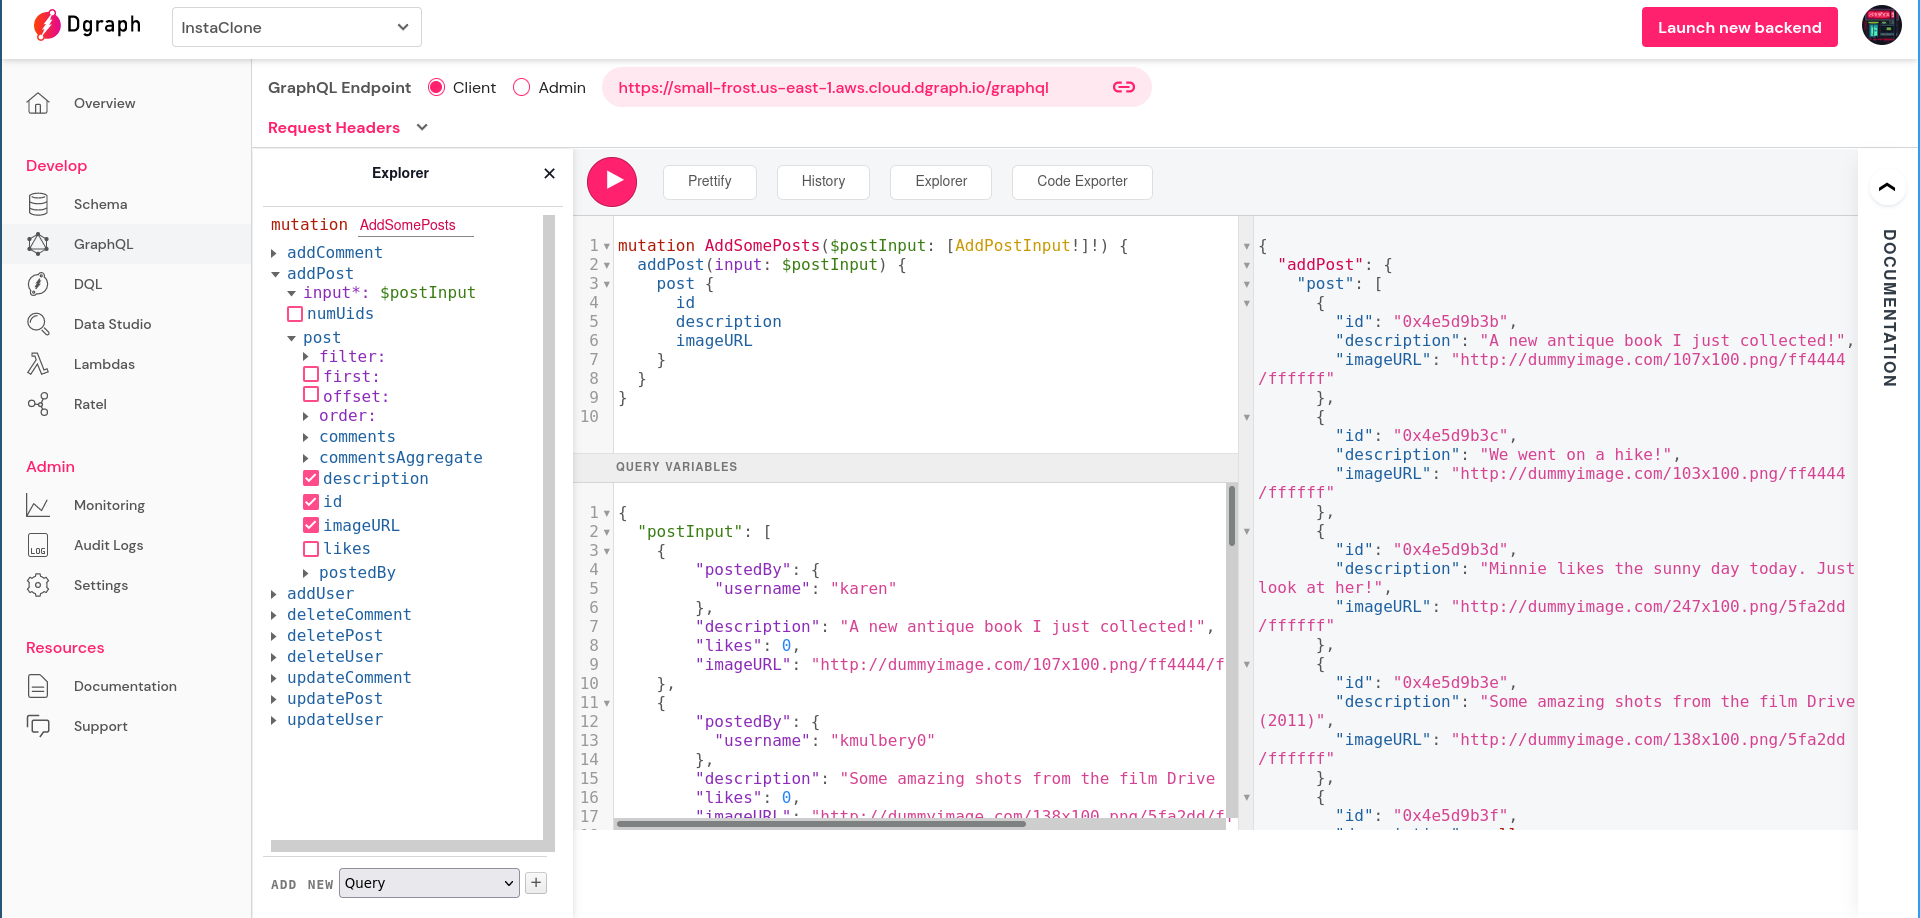
Since they are new posts, all of them have zero likes for now. In the next step let’s simulate other users liking and commenting on them.
You have to know the IDs of all the posts since you’ll need that to connect a comment with the post via the commentOn field. You also need to know the usernames of existing users for the commentbBy field. The following query fetches IDs of existing posts along with usernames of their posters:
query queryAllPosts {
  queryPost {
    id
    postedBy {
      username
    }
  }
}
It gives the following response:
{
  "queryPost": [
    {
      "id": "0x4e5d9b3b",
      "postedBy": {
        "username": "karen"
      }
    },
    {
      "id": "0x4e5d9b3c",
      "postedBy": {
        "username": "foakes"
      }
    },
    {
      "id": "0x4e5d9b3d",
      "postedBy": {
        "username": "docahill2"
      }
    },
    {
      "id": "0x4e5d9b3e",
      "postedBy": {
        "username": "kmulbery0"
      }
    },
    {
      "id": "0x4e5d9b3f",
      "postedBy": {
        "username": "adury4"
      }
    },
    {
      "id": "0x4e5d9b40",
      "postedBy": {
        "username": "rkemwall5"
      }
    },
    {
      "id": "0x4e5d9b41",
      "postedBy": {
        "username": "cparramore6"
      }
    },
    {
      "id": "0x4e5d9b42",
      "postedBy": {
        "username": "ff8"
      }
    },
    {
      "id": "0x4e5d9b43",
      "postedBy": {
        "username": "shaw"
      }
    }
  ]
}
Now we’re ready to do an addComment mutation to add some comments:
mutation AddComments($commentInput: [AddCommentInput!]!) {
  addComment(input: $commentInput) {
    comment {
      text
      commentBy {
        username
      }
      commentOn {
        description
        postedBy {
          username
        }
      }
    }
  }
}
For simplicity, let’s assume that existing users will comment on one another’s posts. The following is the data of the query variable:
{
  "commentInput": [
    {
      "text": "This book's a fantastic addition to your other collections",
      "commentBy": {
        "username": "kmulbery0"
      },
      "commentOn": {
        "id": "0x4e5d9b3b"
      }
    },
    {
      "text": "It's soundtrack made me fall in love with synth and electronic music. Nightcall is goat",
      "commentBy": {
        "username": "karen"
      },
      "commentOn": {
        "id": "0x4e5d9b3e"
      }
    },
    {
      "text": "Minnie cures my sadness every time for the time being. What a sweetie!",
      "commentBy": {
        "username": "foakes"
      },
      "commentOn": {
        "id": "0x4e5d9b3d"
      }
    },
    {
      "text": "I really need to hit the gym again!",
      "commentBy": {
        "username": "adury4"
      },
      "commentOn": {
        "id": "0x4e5d9b40"
      }
    },
    {
      "text": "It's a calm film. The technique of less dialogue and more atmosphere and cinematography makes it a unique cinematic experience indeed, among many other reasons.",
      "commentBy": {
        "username": "shaw"
      },
      "commentOn": {
        "id": "0x4e5d9b3e"
      }
    },
    {
      "text": "Congrats! Can't wait to read it!",
      "commentBy": {
        "username": "kmulbery0"
      },
      "commentOn": {
        "id": "0x4e5d9b43"
      }
    }
  ]
}
This should result in a successful response:
{
  "addComment": {
    "comment": [
      {
        "text": "This book's a fantastic addition to your other collections",
        "commentBy": {
          "username": "kmulbery0"
        },
        "commentOn": {
          "description": "A new antique book I just collected!",
          "postedBy": {
            "username": "karen"
          }
        }
      },
      {
        "text": "It's soundtrack made me fall in love with synth and electronic music. Nightcall is goat",
        "commentBy": {
          "username": "karen"
        },
        "commentOn": {
          "description": "Some amazing shots from the film Drive (2011)",
          "postedBy": {
            "username": "kmulbery0"
          }
        }
      },
      {
        "text": "Minnie cures my sadness every time for the time being. What a sweetie!",
        "commentBy": {
          "username": "foakes"
        },
        "commentOn": {
          "description": "Minnie likes the sunny day today. Just look at her!",
          "postedBy": {
            "username": "docahill2"
          }
        }
      },
      {
        "text": "I really need to hit the gym again!",
        "commentBy": {
          "username": "adury4"
        },
        "commentOn": {
          "description": "Workout time...",
          "postedBy": {
            "username": "rkemwall5"
          }
        }
      },
      {
        "text": "It's a calm film. The technique of less dialogue and more atmosphere and cinematography makes it a unique cinematic experience indeed, among many other reasons.",
        "commentBy": {
          "username": "shaw"
        },
        "commentOn": {
          "description": "Some amazing shots from the film Drive (2011)",
          "postedBy": {
            "username": "kmulbery0"
          }
        }
      },
      {
        "text": "Congrats! Can't wait to read it!",
        "commentBy": {
          "username": "kmulbery0"
        },
        "commentOn": {
          "description": "Cover photo of my book that's hitting the shelves in September!",
          "postedBy": {
            "username": "shaw"
          }
        }
      }
    ]
  }
}
Now let’s simulate the event of liking posts. As I mentioned previously, this falls under the update operation category that updates an already existing piece of data or a part of it, like someone gaining a new follower. Let’s see how this works. When someone hits the like button on a post, that event would trigger the associated mechanism and the app would use the id of the post to update its like data. It’ll use the following query to do so:
mutation LikeSomePosts($postUpdate: UpdatePostInput!) {
  updatePost(input: $postUpdate) {
    post {
      id
      description
      likes
    }
  }
}
The query variable contains:
{
  "postUpdate": {
    "filter": {
      "id": "0x4e5d9b3e"
    },
    "set": {
      "likes": 10
    }
  }
}
We’re specifying the id of the post as a filter to filter out the relevant post and set its like field to the updated value. The response is:
{
  "updatePost": {
    "post": [
      {
        "id": "0x4e5d9b3e",
        "description": "Some amazing shots from the film Drive (2011)",
        "likes": 10
      }
    ]
  }
}
You can confirm further by doing a getPost query for that post:
query MyQuery {
  getPost(id: "0x4e5d9b3e") {
    description
    likes
    postedBy {
      name
    }
  }
}
This will yield:
{
  "getPost": {
    "description": "Some amazing shots from the film Drive (2011)",
    "likes": 10,
    "postedBy": {
      "name": "Kimberlee Mulbery"
    }
  }
}
In this same way you can also dispatch an updateUser request and set its follower
field when someone gains (or loses) a follower.
The application feed would contain posts from the users someone is following. Can you guess how to fetch all the data for that?
Dgraph has a robust set of search and filtering tools that you can use (and define yourself in the schema as per your needs) in scenarios such as this. Here, the app just needs to send a queryPost request asking for all the posts from everyone the user is following. Since usernames can uniquely identify each user, the app can use that as a filter.
For example, the following fetches data from two users:
query {
  queryUser(filter: { username: { in: [
    "kmulbery0",
    "rkemwall5"
  ]}}) {
    username
    avatarImageURL
    posts {
      description
      imageURL
      comments {
        text
        commentBy {
          username
          avatarImageURL
        }
      }
    }
  }
}
This yields:
{
  "queryUser": [
    {
      "username": "rkemwall5",
      "avatarImageURL": "https://robohash.org/etenimdeleniti.png?size=50x50&set=set1",
      "posts": [
        {
          "description": "Workout time...",
          "imageURL": "http://dummyimage.com/194x100.png/5fa2dd/ffffff",
          "comments": [
            {
              "text": "I really need to hit the gym again!",
              "commentBy": {
                "username": "adury4",
                "avatarImageURL": "https://robohash.org/impediteaet.png?size=50x50&set=set1"
              }
            }
          ]
        }
      ]
    },
    {
      "username": "kmulbery0",
      "avatarImageURL": "https://robohash.org/voluptatibussapientein.png?size=50x50&set=set1",
      "posts": [
        {
          "description": "Some amazing shots from the film Drive (2011)",
          "imageURL": "http://dummyimage.com/138x100.png/5fa2dd/ffffff",
          "comments": [
            {
              "text": "It's soundtrack made me fall in love with synth and electronic music. Nightcall is goat",
              "commentBy": {
                "username": "karen",
                "avatarImageURL": "https://robohash.org/fugitetautem.png?size=50x50&set=set1"
              }
            },
            {
              "text": "It's a calm film. The technique of less dialogue and more atmosphere and cinematography makes it a uniuqe cinematic experience indeed, among many other reasons.",
              "commentBy": {
                "username": "shaw",
                "avatarImageURL": "https://robohash.org/illumsintvoluptas.png?size=50x50&set=set1"
              }
            }
          ]
        }
      ]
    }
  ]
}
Dgraph automatically generates this in filter for fields with the @id directive.
You have the usernames and their associated avatars, and their posts with images, descriptions and comments. They’re all you need to render the feed.
Check out the query docs on search and filtering if you’re curious to know more. You can also go through this article that’ll give you a hands-on view of the search and filtering features Dgraph possesses.
In this article, we learned how to use a GraphQL schema to model an application’s data and bring it under an explicit structure defining its various data objects and relationships. Later we saw how to process various requests to fetch and modify data. GraphQL is the perfect tool to use in social media applications where data is highly connected and you need to traverse these graphs to compose satisfactory responses for the request traffic.
Dgraph Cloud makes GraphQL super-easy like none other by bringing you a production-ready GraphQL API and corresponding database just from a single schema. It gives you a highly scalable way to meet your application’s evolving set of requirements. No need to write API boilerplates, then get distracted in connecting layers and tools to get the server side ready. So if you loved what you saw here today, sign up and take your next idea from zero to production-ready in a matter of minutes!