
GraphQL Sorting: A Beginner's Guide
Sorting data in GraphQL is a powerful tool that enhances the usability and performance of your applicatio ...
Learn more

Update: On April 16th 2021, Slash GraphQL was officially renamed Dgraph Cloud. All other information below still applies.
Insomnia is one of the most popular API development tools that also support GraphQL. In this article, you’ll find out how you can use Insomnia to interact with a Slash GraphQL instance and perform GraphQL requests such as mutations, queries, etc. so that you can sketch out your thoughts and start prototyping your GraphQL application.
Insomnia has some handy features that make it easier to perform administrative tasks like we did using Postman. So you’re also going to see how Insomnia can be set up with those requests.
Slash GraphQL is Dgraph’s fully-managed backend service, which takes the hassle away from building GraphQL applications. No need to write resolvers or anything on your own to build your API, you just need to get your GraphQL schema ready with types representing your application data and Slash GraphQL will give you a complete backend with production-level features built-in. So you can just focus on building your app with no distractions from the backend.
So head over to Slash GraphQL and sign up for free. It takes only a minute or so to get a fully functional backend running.
After signing up and logging in, you’ll see your dashboard.
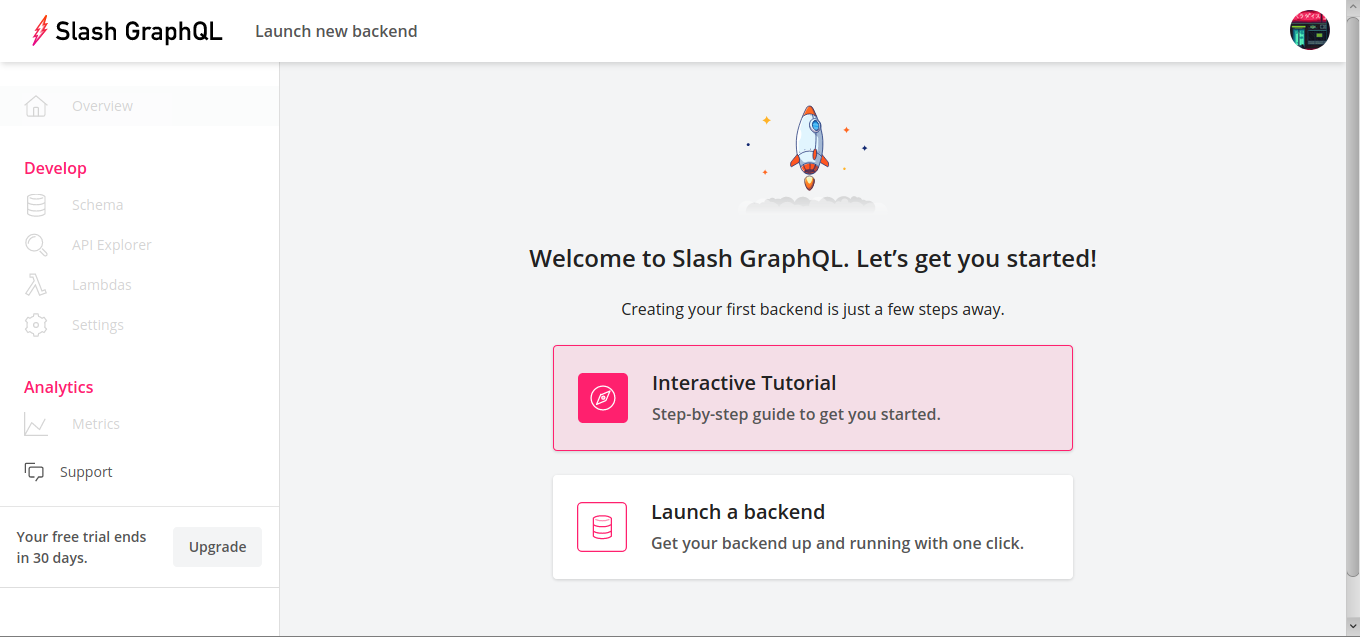
You can try and play around with Slash GraphQL free for a month. Then if you feel like it, you can upgrade by clicking on the Upgrade button in the lower left of the sidebar.
So click on the Launch a backend button for now; if you want you can start taking the Interactive Tutorial and get a guided tour of how to get around with Slash GraphQL.
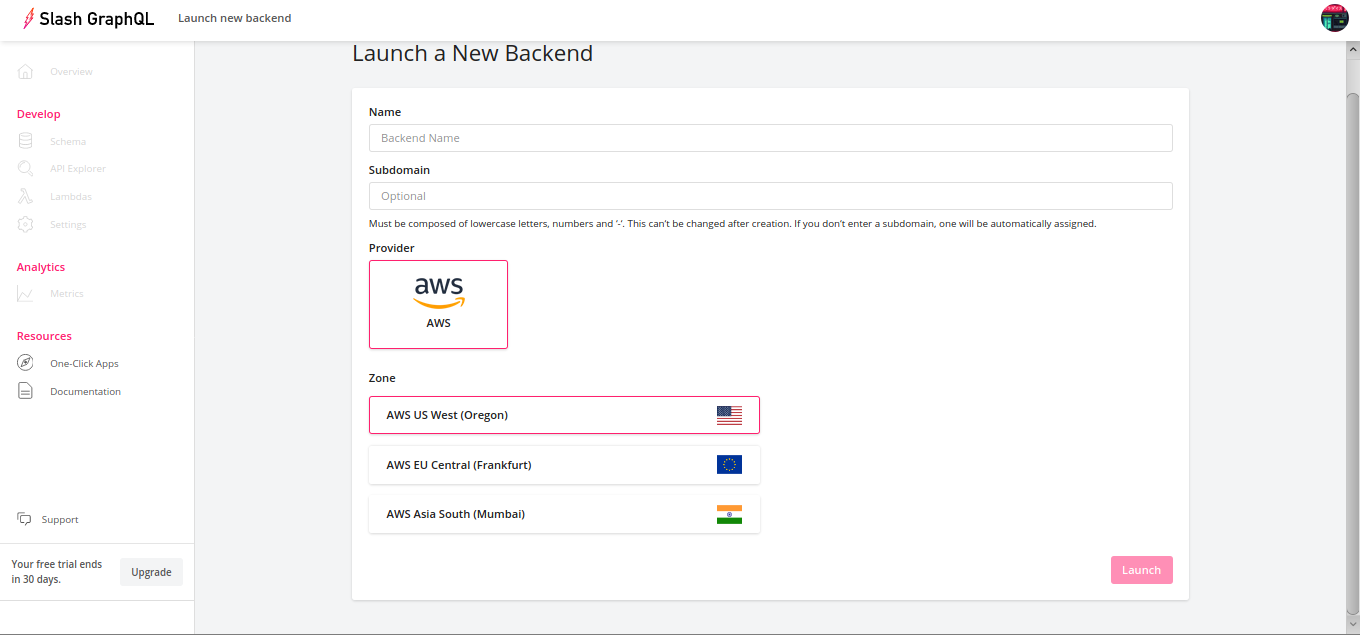
Hit Launch and your backend will be ready in a jiffy.
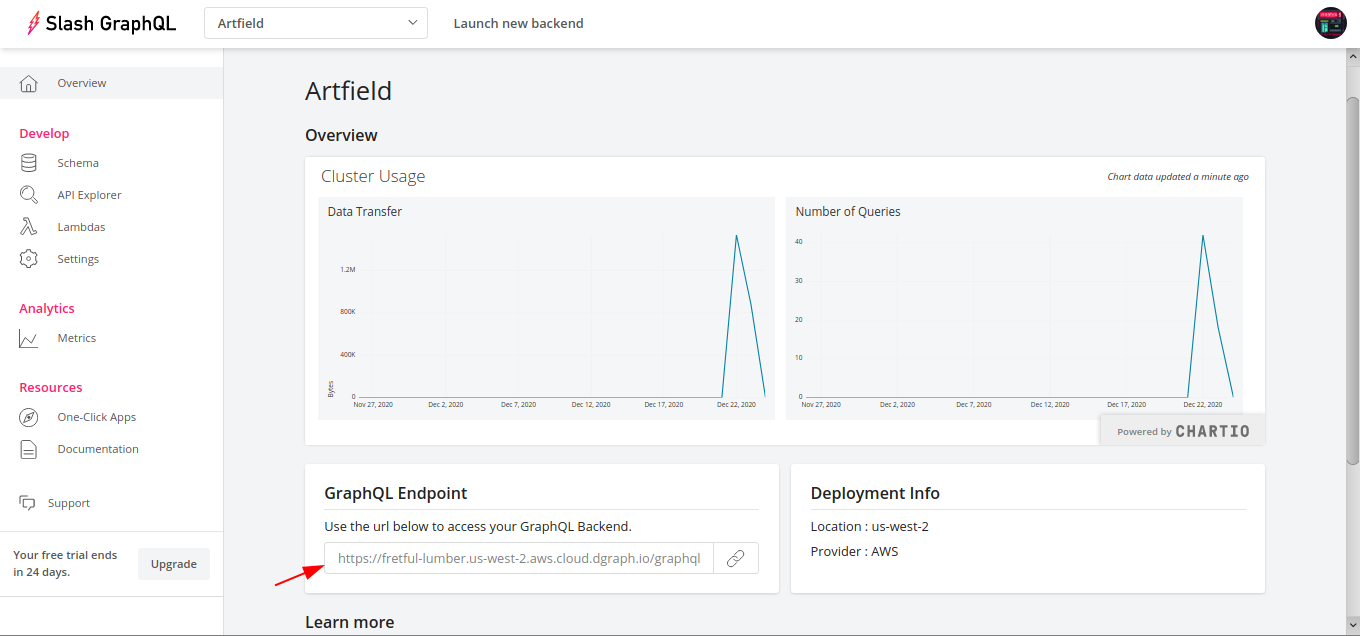
After the deployment finishes, your dashboard will show you some information, including the URL of your new server. Note that down since you’ll need it for Insomnia to interact with your backend.
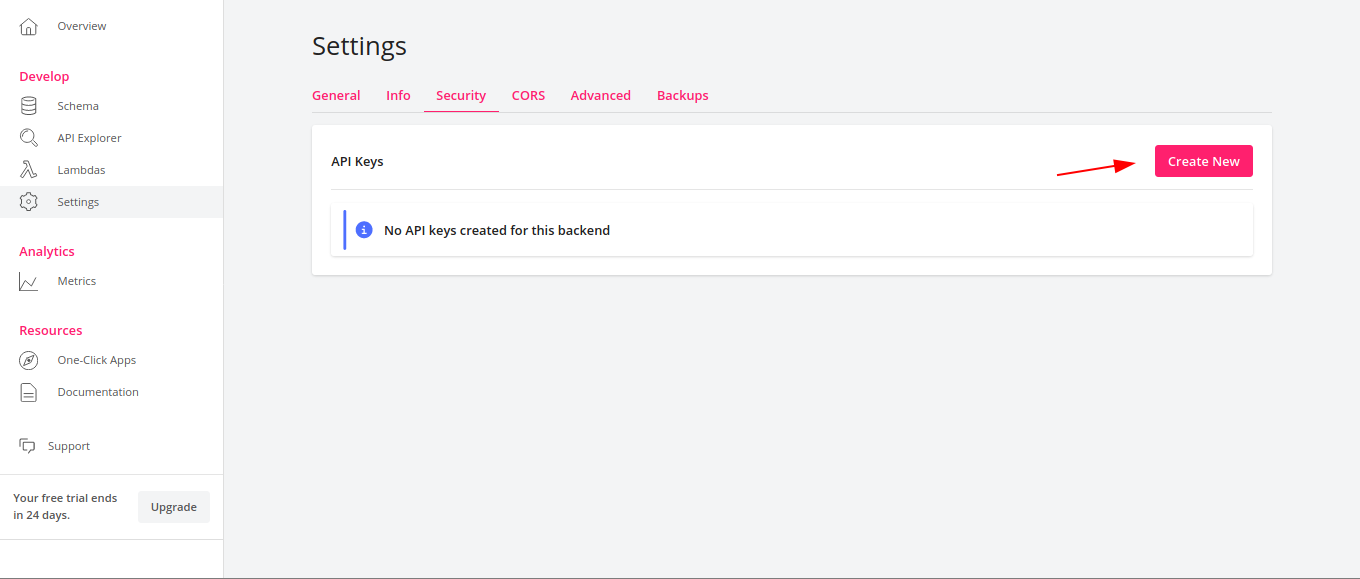
Remote admin operations using tools like Insomnia and Postman require authentication, so you’ll need an API key. Select Settings in the left sidebar, go to the Security tab, and click on Create New.
In the next window give your key a name and select the role (in this case choose Admin), then hit Create.
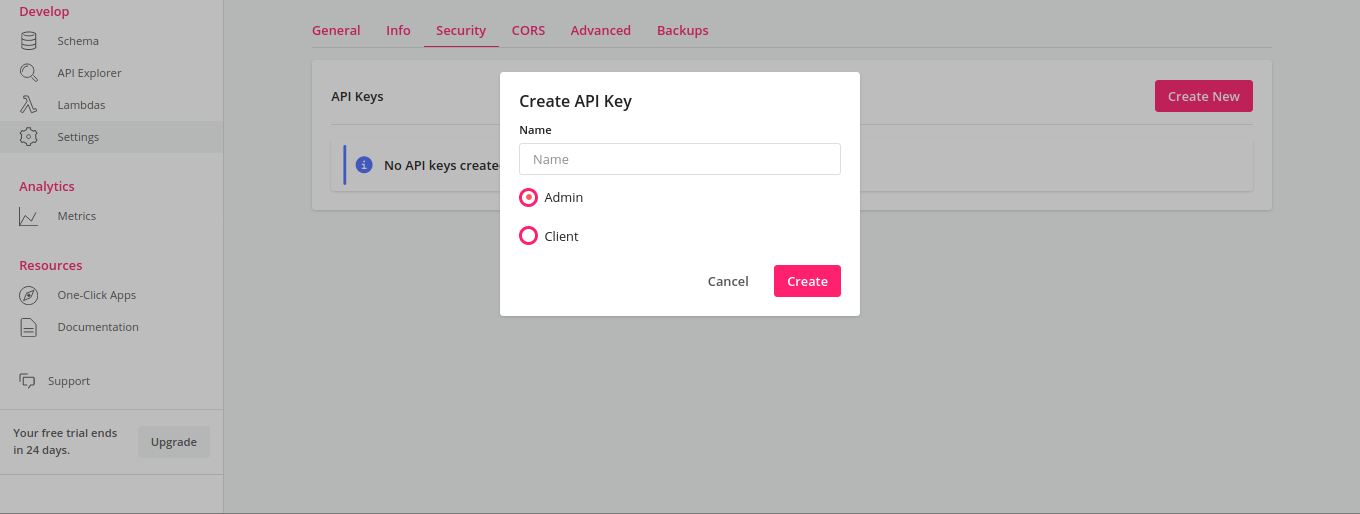
Note down the generated key and keep it somewhere safe; you won’t be able to access it after closing down that window. If you happen to lose your key or forget to copy it, you can generate a new one from Create New. Later you’ll need to include this key as an HTTP header when sending admin requests to your GraphQL backend.
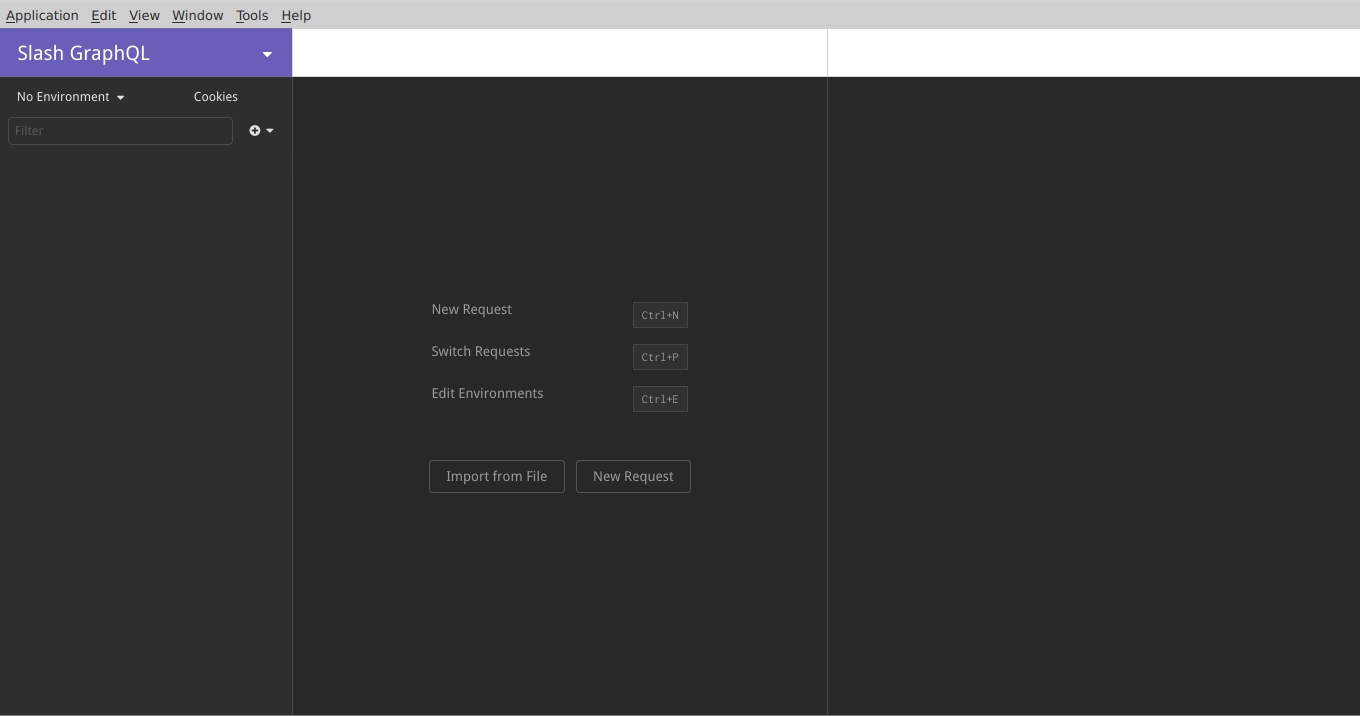
Let’s explore some features of Insomnia and get it ready so that we can start doing some fun stuff.
Insomnia lets users create “workspaces” for each project that they’re working on. Click on the top-left menu on the sidebar colored in purple and select Create Workspace. The tasks now at hand are all with Slash GraphQL backend, so let’s name it “Slash GraphQL”.
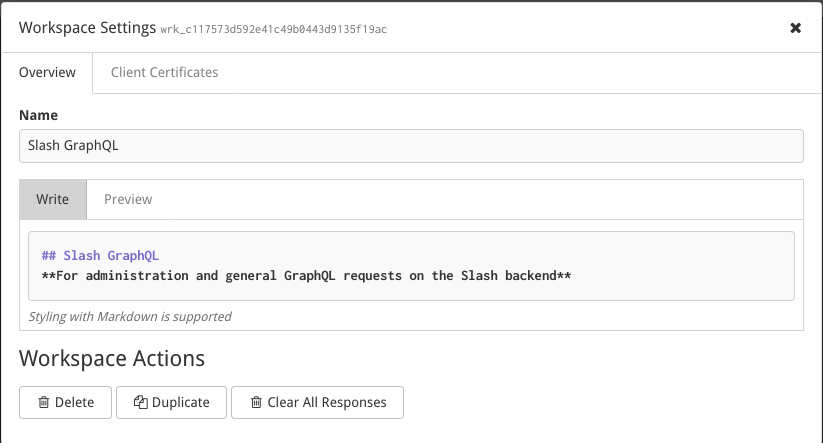
Just naming it so isn’t that informative. Press Shift+Ctrl+ to open your workspace settings and type in a description for your project workspace:
Insomnia offers a way to set up “environments” that can contain values (or more familiarly “environment variables”) that are used throughout multiple requests and workflows. Obviously, you’ll need your server URL in all of your requests; and the /admin endpoint requires authentication in order to be accessible. So let’s wrap them up in two variables so you can reuse them at ease.
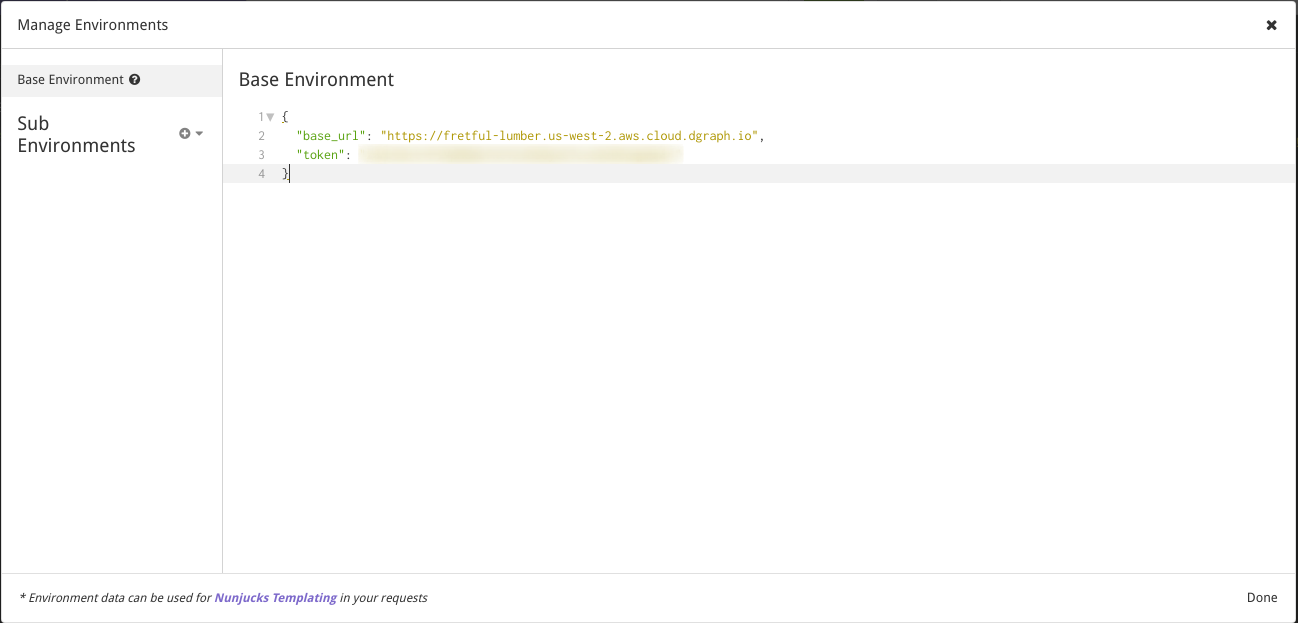
Fire up Insomnia and click on the No Environment button in the sidebar. Then select Manage Environments:
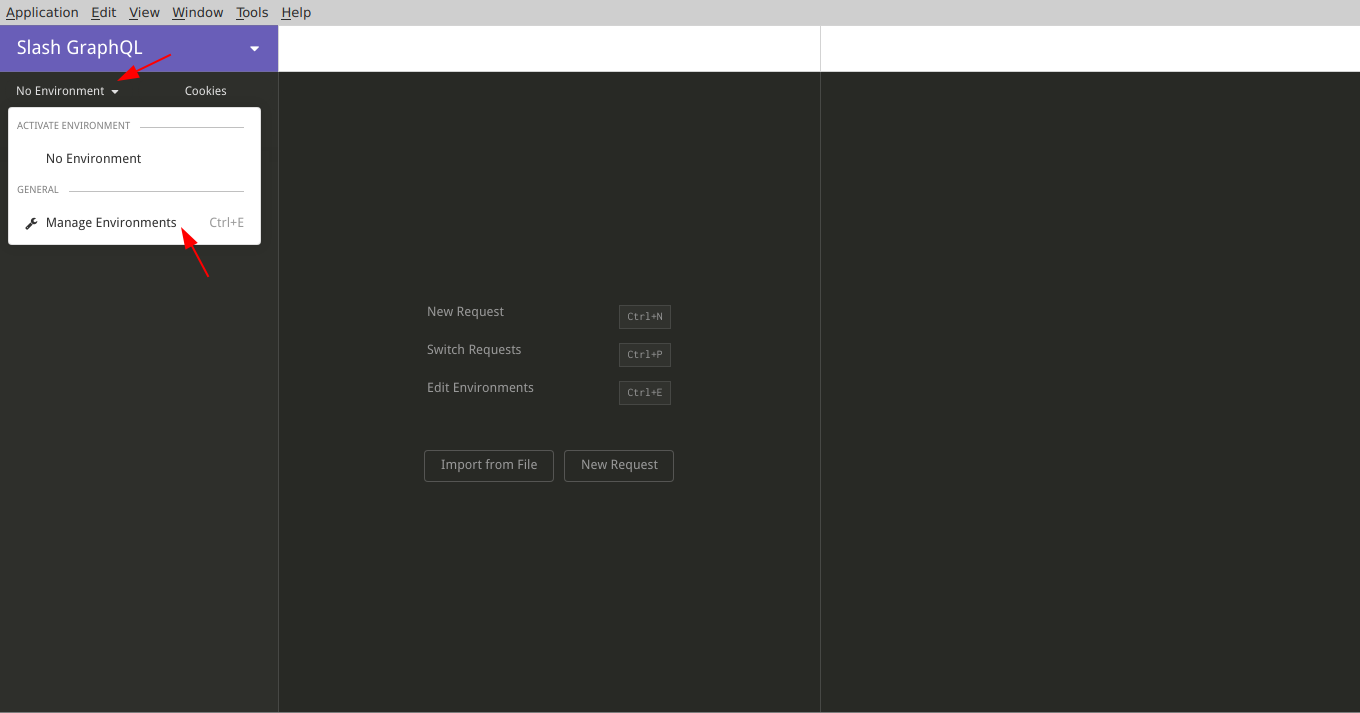
The Base Environment will work nicely for now. The base_url would hold the backend URL and token the API key for authentication. You can generate a key for your backend easily from your Slash dashboard by going to Settings and then the Security tab.
With these variables in place, you’re ready to start making requests. Let’s continue and see how Insomnia offers a clean way of organizing request workflows.
You can make folders that each represent different parts of your development in a project. For example, you’re going to make a folder that’s going to contain the necessary requests to administer the backend, according to the docs here. So it’ll have these four requests:
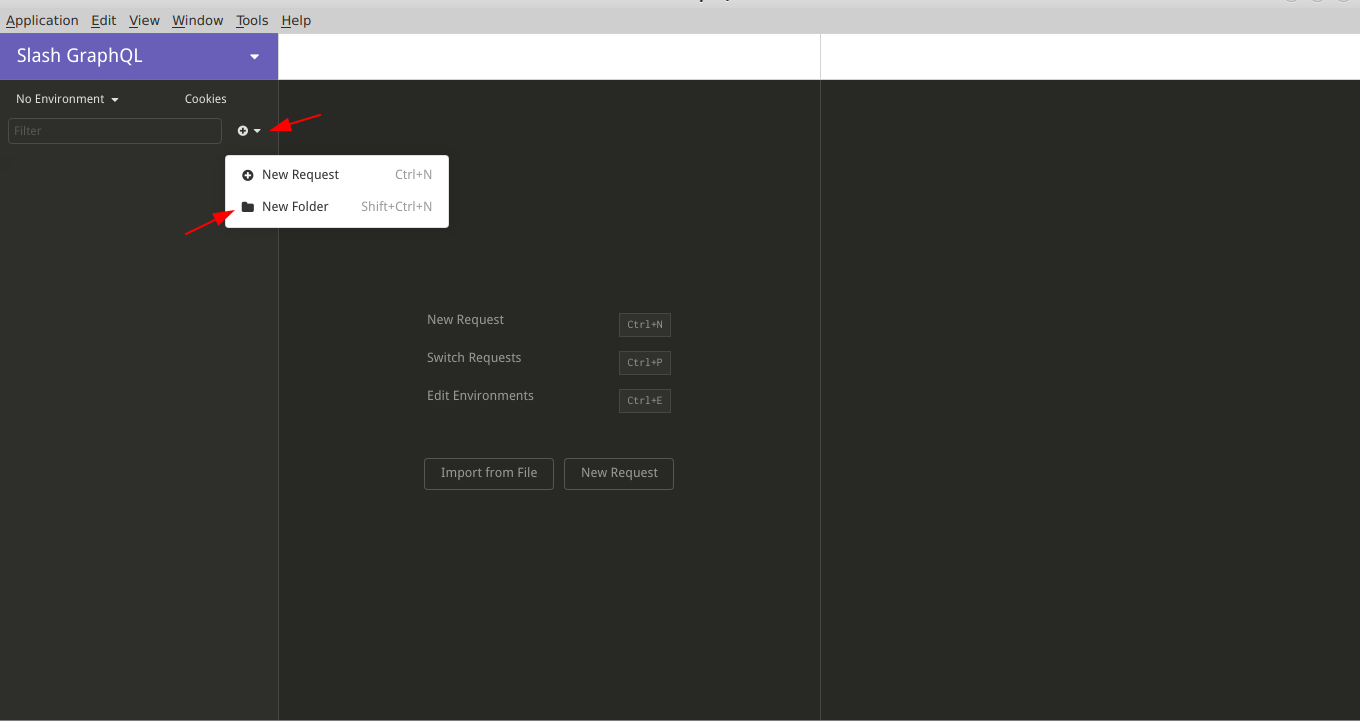
Click on the plus (+) icon at the top left in the sidebar and select on New Folder:
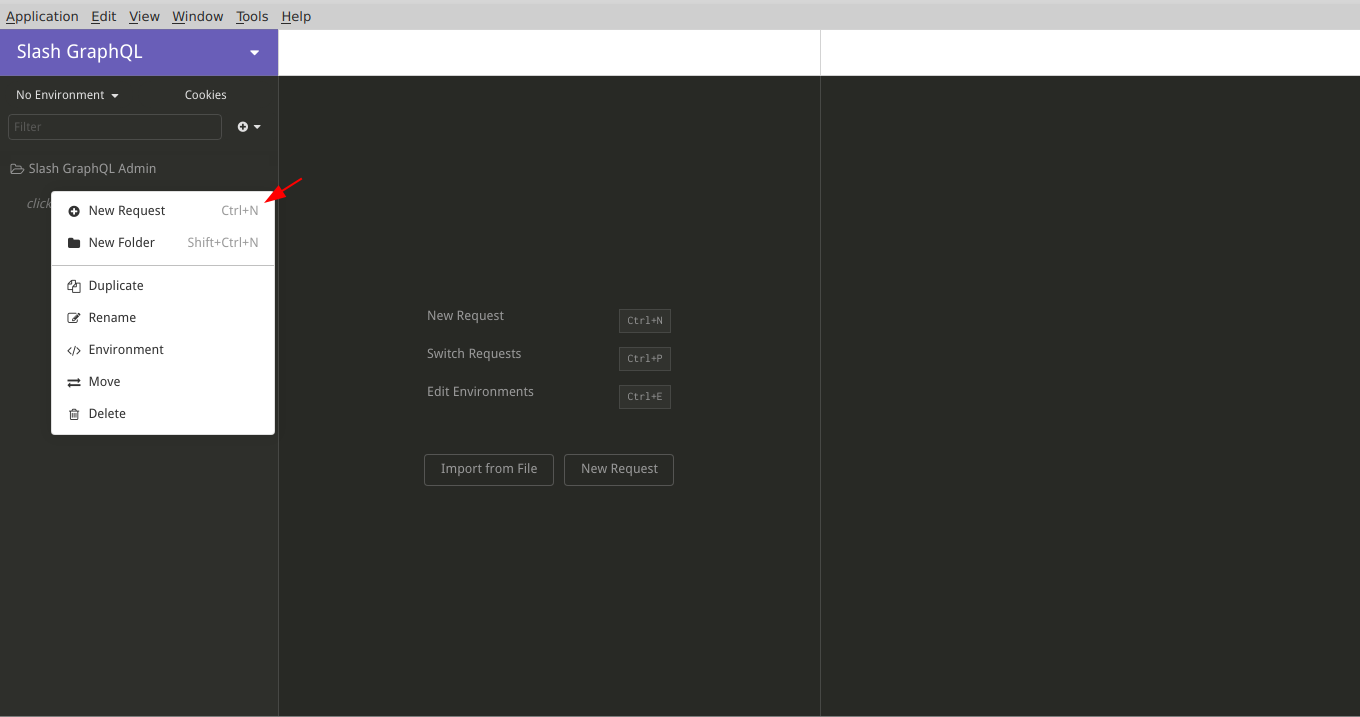
If you do a right-click on the new folder you’ll see that it’s possible to create sub-folders as well!
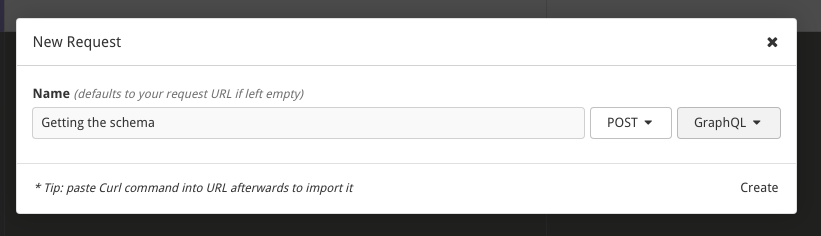
Now let’s create those requests. Do a right-click on the folder and select New Request.
This request is for fetching the current schema in your server from the /admin endpoint. Select POST as the method and GraphQL as the format and hit Create.
As with writing code, it’s good practice to add documentation while working with APIs as well and tools like Insomnia and Postman offer ways to do that. Let’s add a description for the request as to what it does and the context like you saw when creating the workspace. Right click on the request and select Settings. In the new window, write a short description for the request:
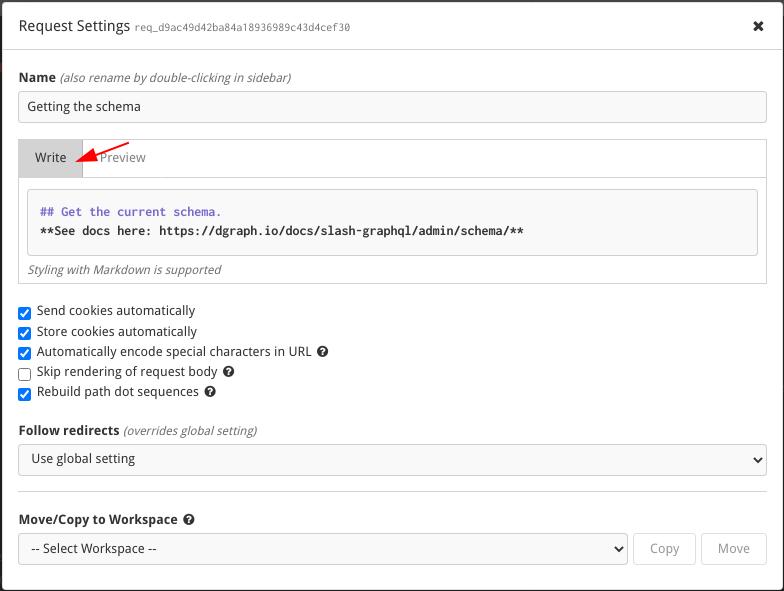
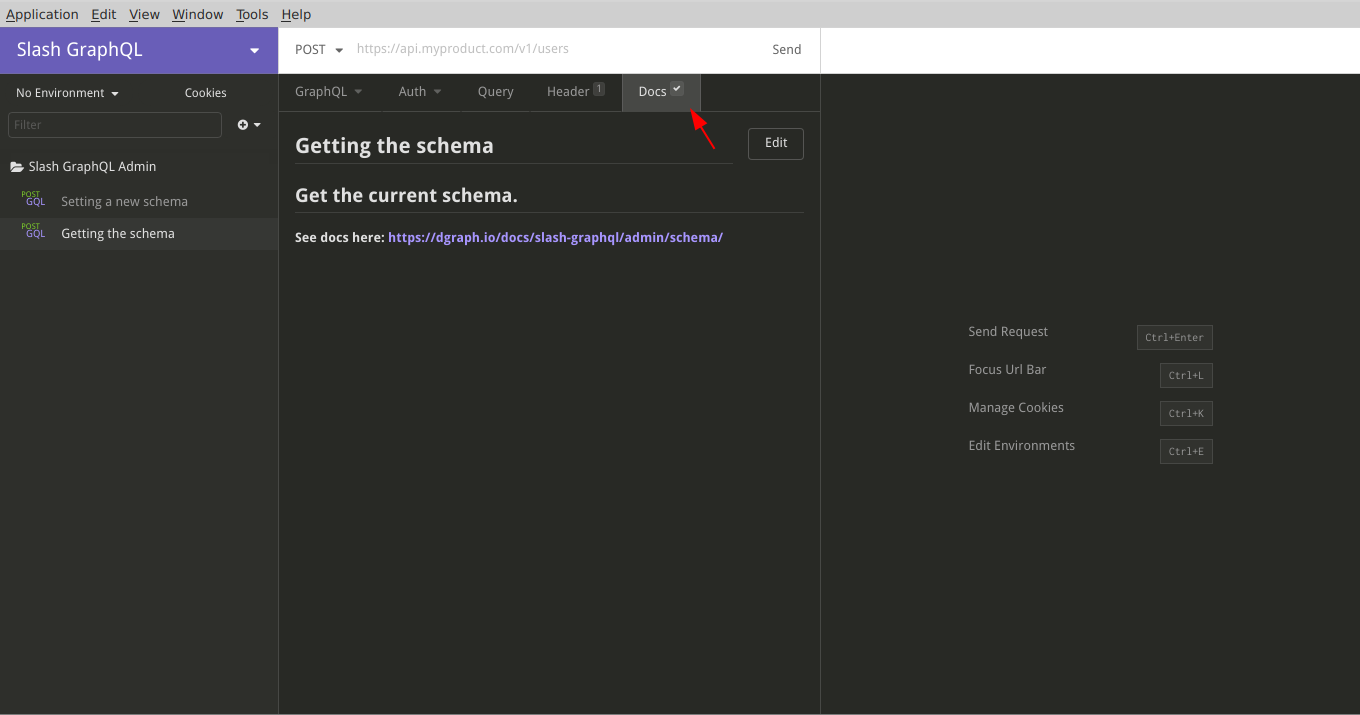
As you can see, you can write it in Markdown! You can see the description in the Docs tab:
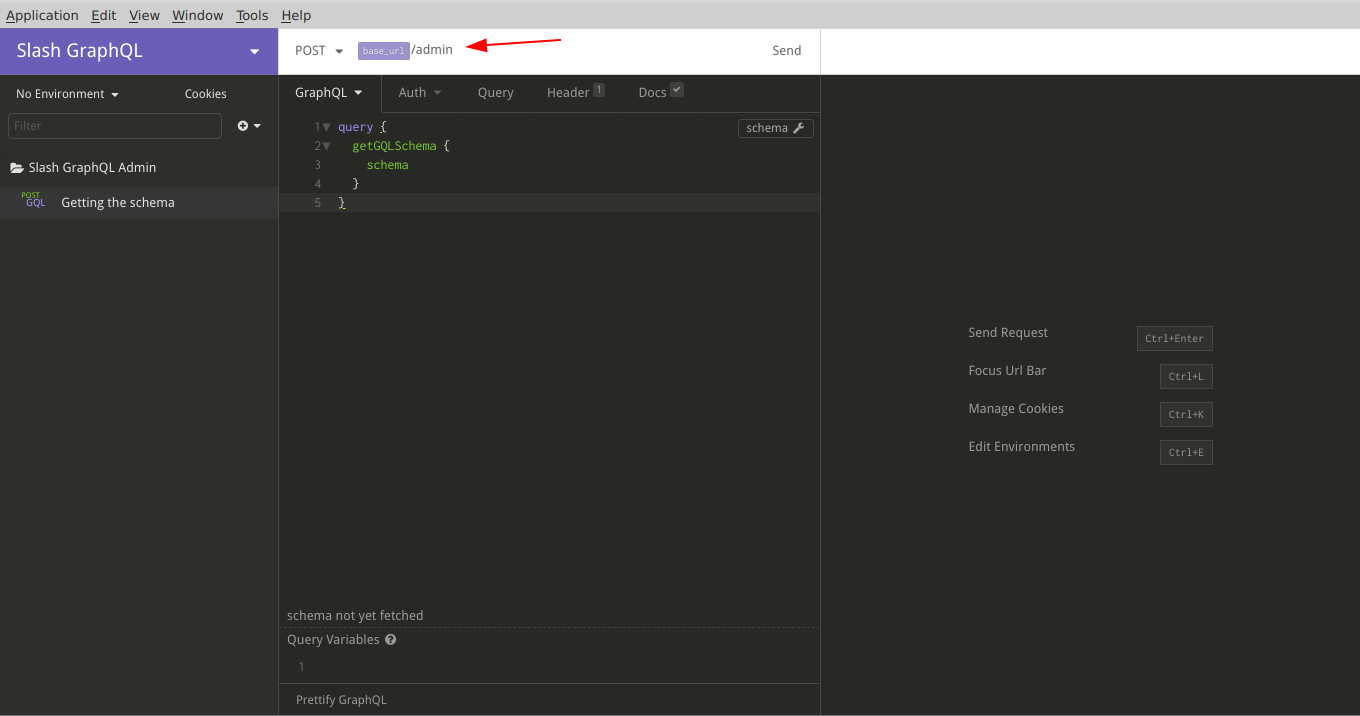
Now add the following GraphQL query in the GraphQL tab that would send a request to fetch the current schema:
query {
  getGQLSchema {
    schema
  }
}
The URL bar is still empty. Earlier you set up a variable containing the base URL for the server. If you start typing in base_url you should see an autocomplete suggestion from Insomnia. If not you can just press Ctrl+Space; base_url would be there in the modal list that appears with matching suggestions. Hit enter. Now you just type in /admin after that.
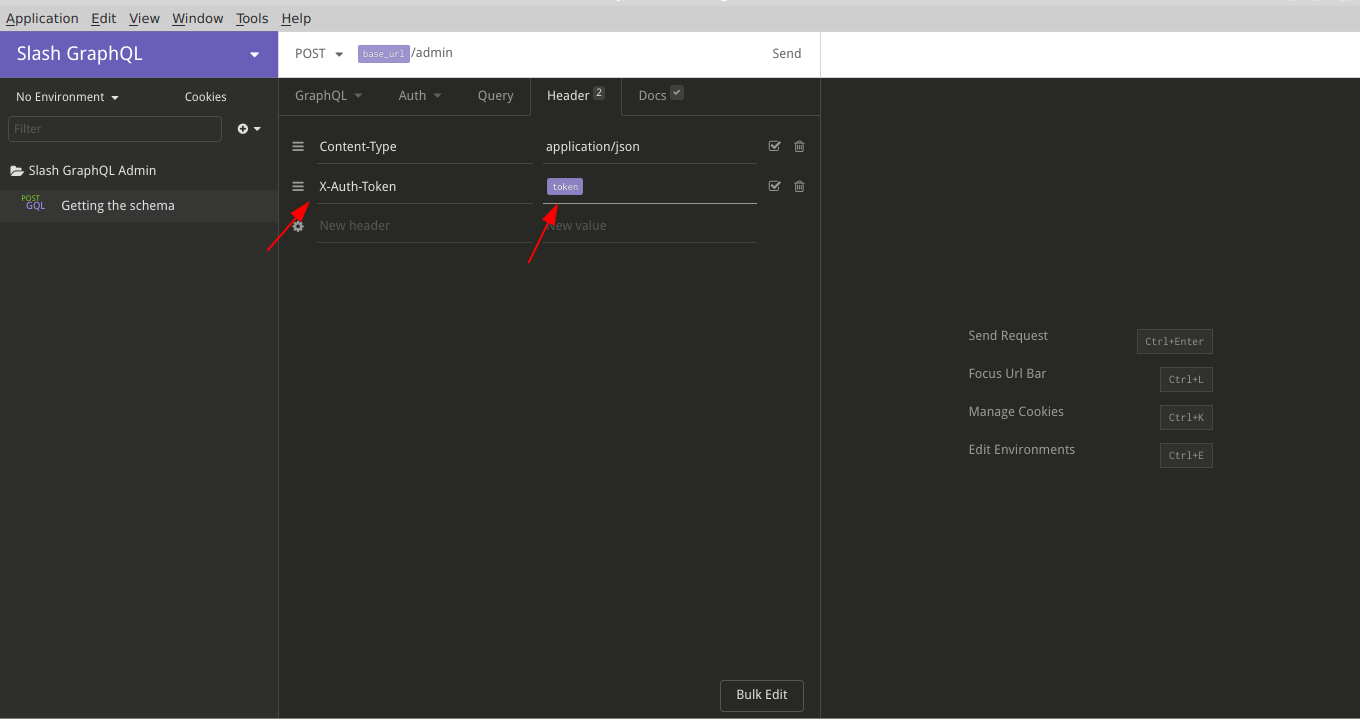
You need to get authenticated, remember? Time to use that token variable.
The token would be sent as an HTTP header as X-Auth-Token. Open the Header tab and type in those values:
You’re ready to dispatch your request. Hit send and you’ll see a satisfying response:
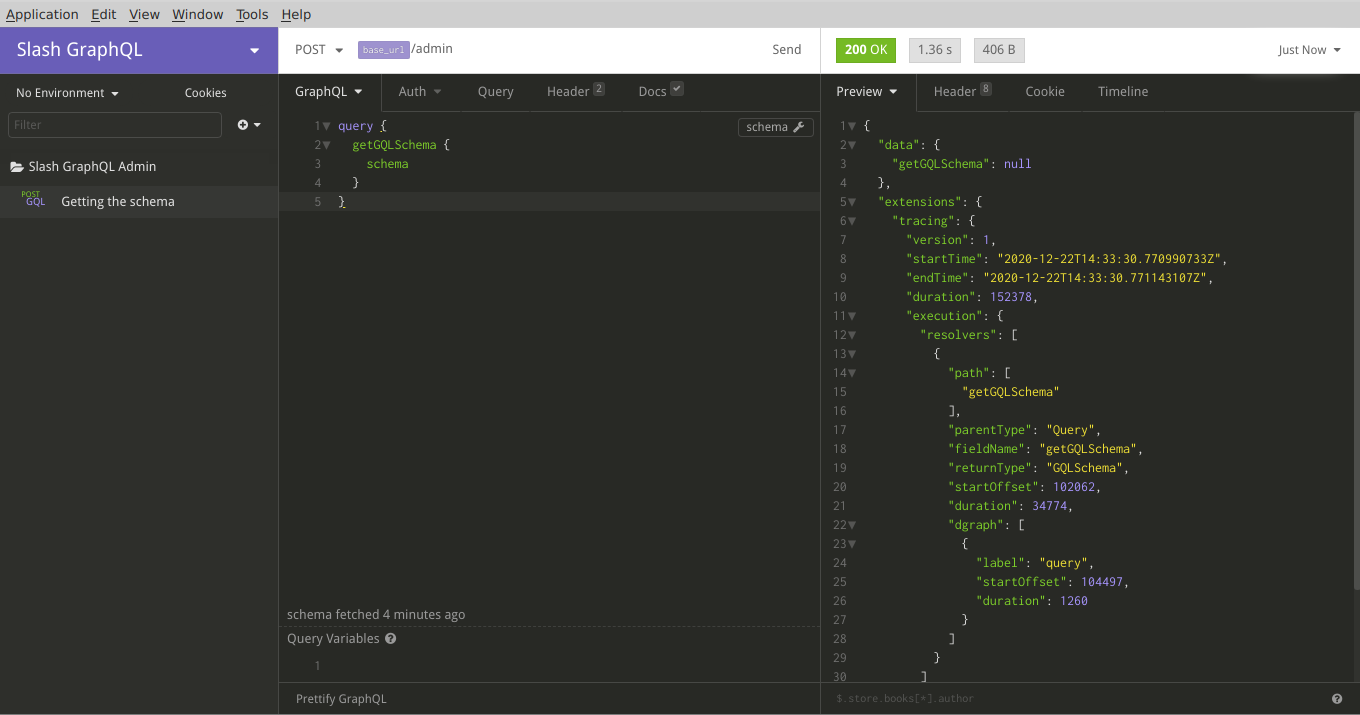
Well not quite… this is a null response because no schema hasn’t been added yet. We’ll get to that in a minute, but most importantly, requests are working!
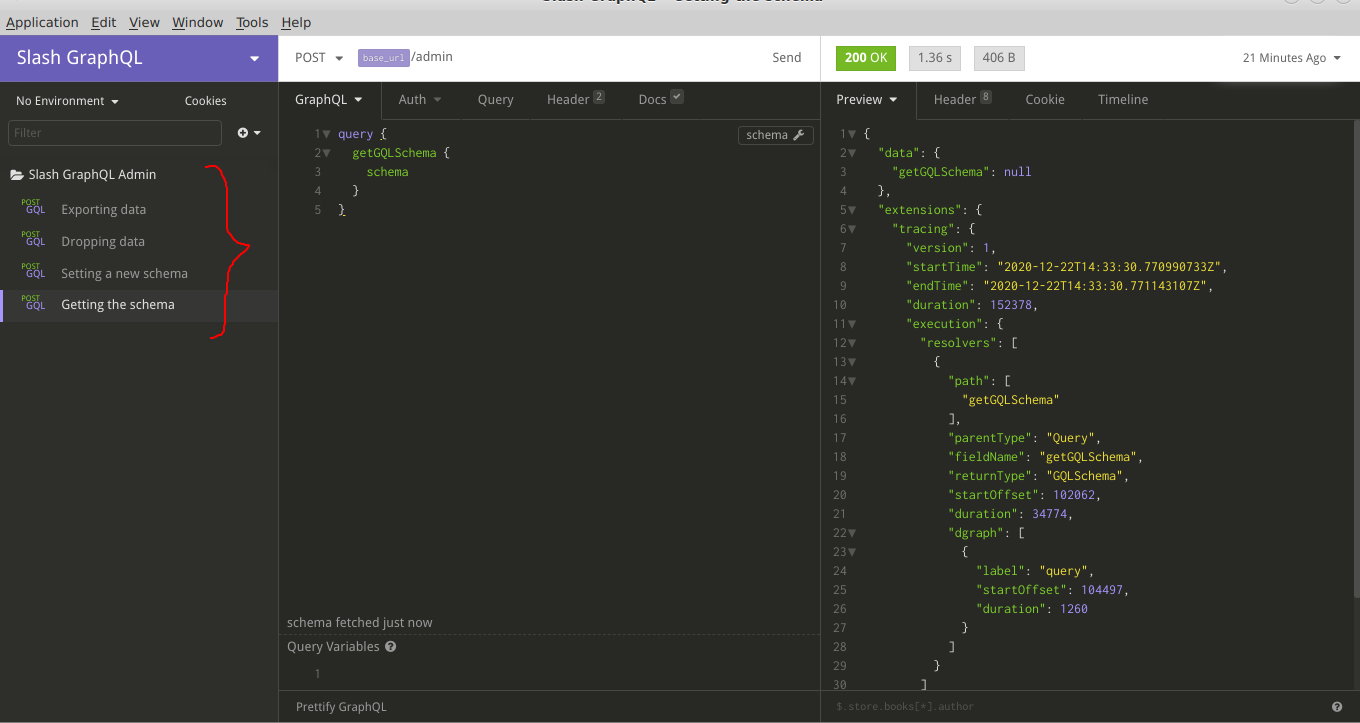
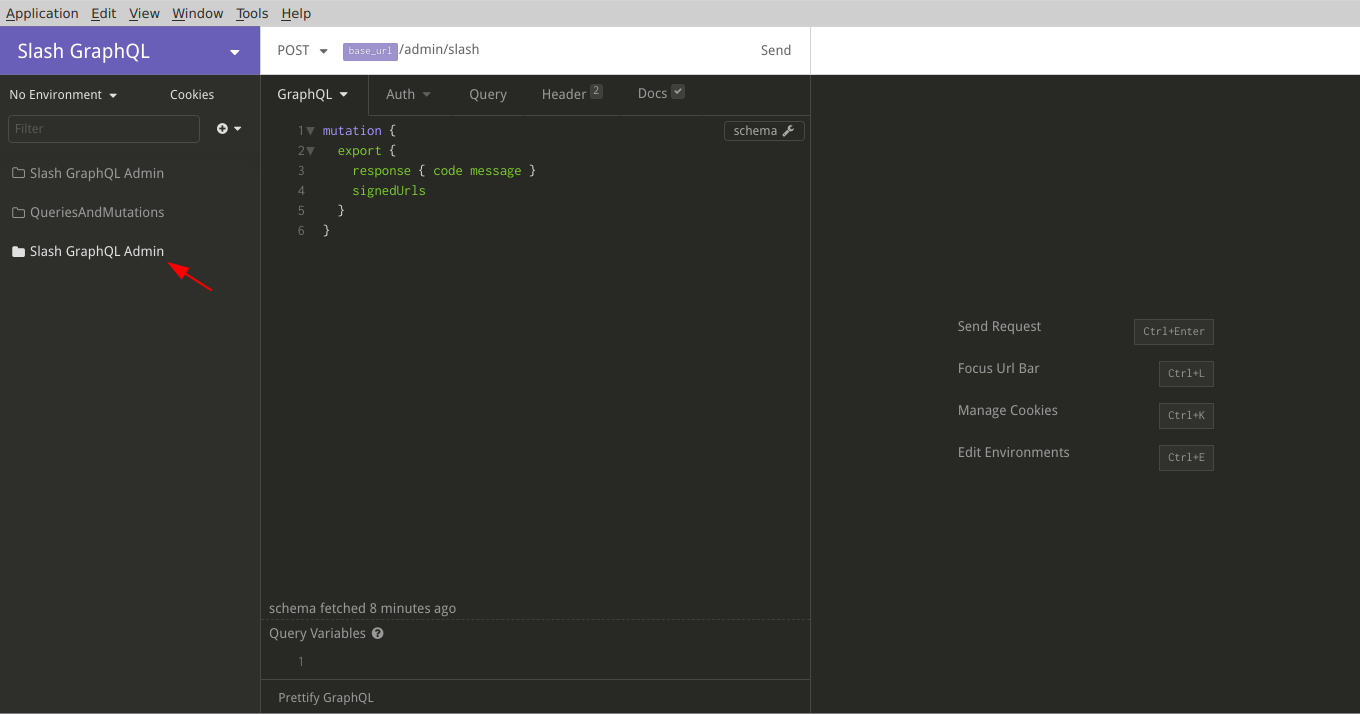
In the same way, you can easily add the rest of those requests; remember to include the X-Auth-Token header with your token. After finishing, you can see all the requests under the Slash GraphQL Admin folder neatly arranged:
Now let’s add a schema.
The schema is going to represent a simple website where users can post their various works of art in the format of a photo or even a short video; it could be photography, digital or handmade paintings, sculptures, etc.
type User {
    id: ID!
    username: String! @search
    submissions: [Art] @hasInverse(field: posted_by)
}

type Art {
    id: ID!
    category: String! @search
    title: String!
    format: String!
    posted_by: User!
}
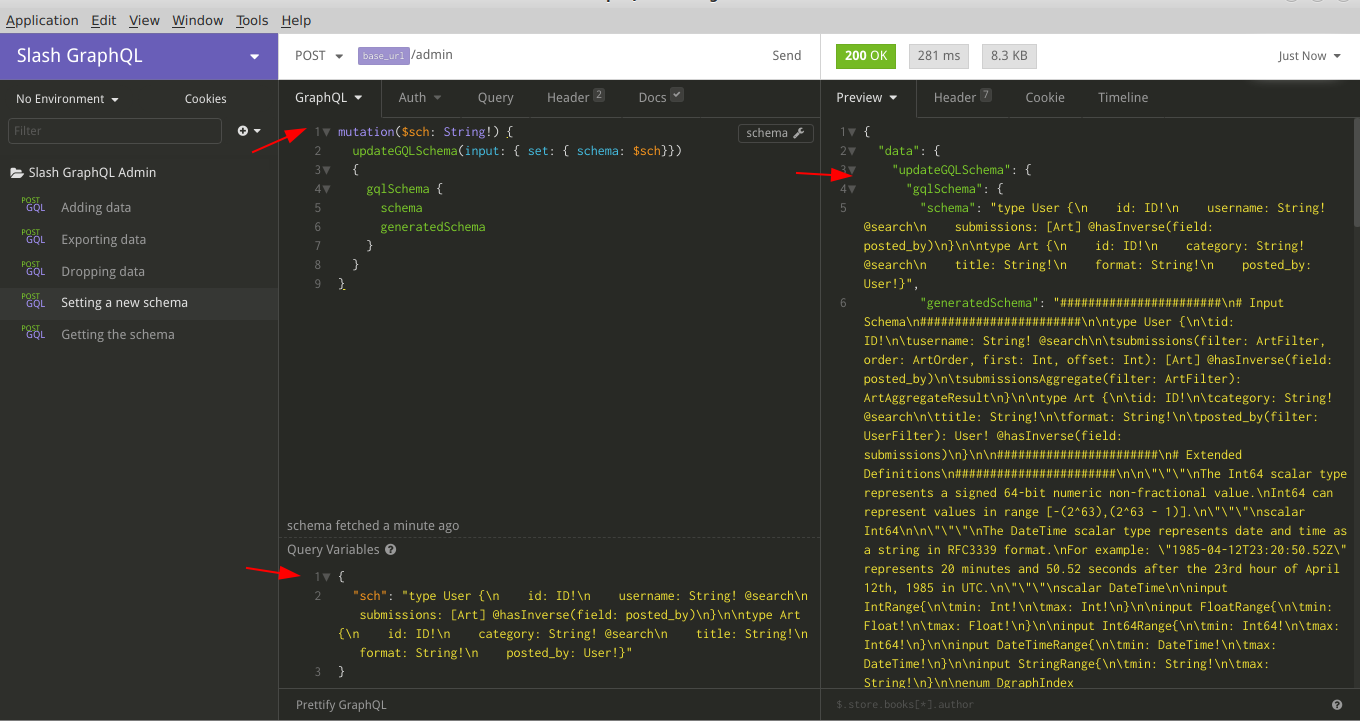
You can deploy this schema from within the Slash UI but here let’s set the schema using Insomnia. That’s just a mutation request:
mutation($sch: String!) {
  updateGQLSchema(input: { set: { schema: $sch}})
  {
    gqlSchema {
      schema
      generatedSchema
    }
  }
}
The sch variable would hold the schema:
{
    "sch": "type User {\n    id: ID!\n    username: String! @search\n    submissions: [Art] @hasInverse(field: posted_by)\n}\n\ntype Art {\n    id: ID!\n    category: String! @search\n    title: String!\n    format: String!\n       posted_by: User!}"
}
Hit send and you’ll get a response with the schema and generatedSchema field:
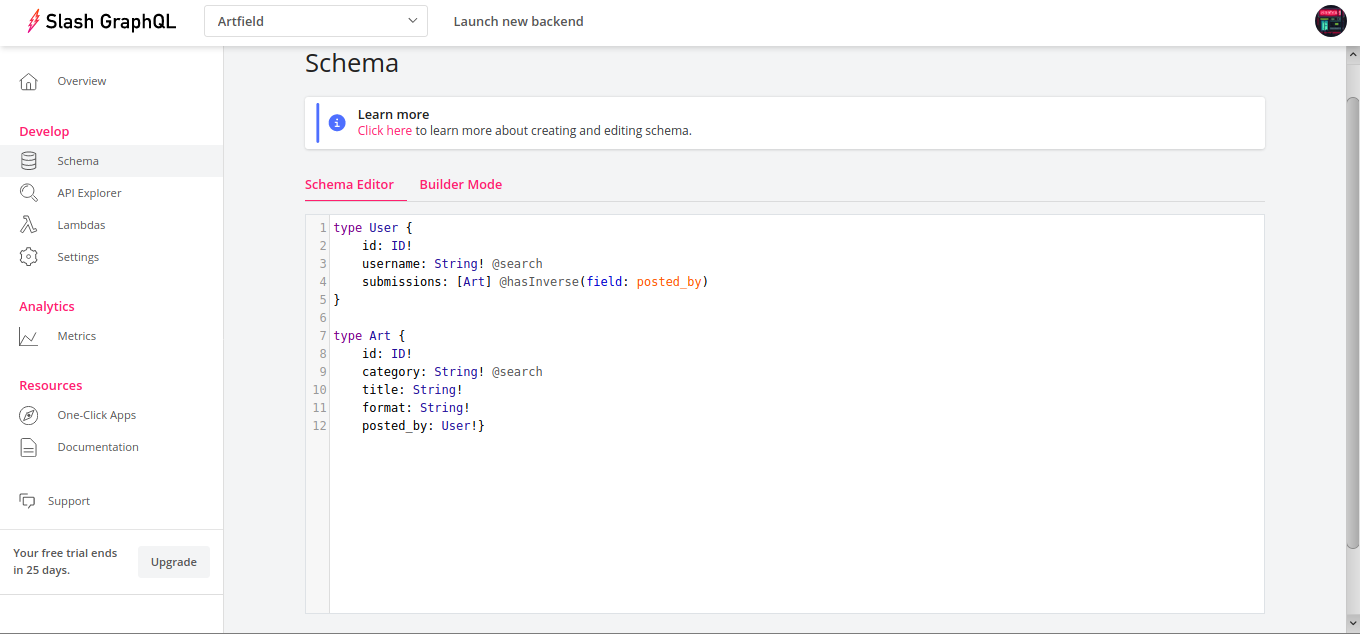
That’s all there’s to it! You can head over to your Slash dashboard and verify that your schema got deployed from the Schema section on the left sidebar:
The backend is now ready with a graph giving the application a well-structured skeleton where you can start putting in data. Let’s go and do that.
These would be just normal GraphQL mutations to add data and queries to iterate over as you wish, not admin requests, so remember to fill in the URL field with the base_url variable and /graphql endpoint.
Create another folder titled QueriesAndMutation and add a Adding user request there:
mutation($userDetails: [AddUserInput!]!) {
  addUser(input: $userDetails) {
    user {
      username
      submissions {
        title
        category
        format
        posted_by {
          username
        }
      }
    }
  }
}
With the $userDetails variabe as:
{
  "userDetails": [
    {
      "username": "thomas",
      "submissions": [
        {
          "category": "Digital Painting",
          "format": "Photo",
          "title": "The Good Times",
          "posted_by": {
            "username": "thomas"
          }
        }
      ]
    },
    {
      "username": "albert",
      "submissions": [
        {
          "category": "Short Film",
          "format": "Video",
          "title": "Songbird",
          "posted_by": {
            "username": "albert"
          }
        },
        {
          "category": "Photography",
          "format": "Photo",
          "title": "Last Sunset",
          "posted_by": {
            "username": "albert"
          }
        }
      ]
    },
    {
      "username": "phill",
      "submissions": [
        {
          "category": "Short Film",
          "format": "Video",
          "title": "Secret Skies",
          "posted_by": {
            "username": "phill"
          }
        },
        {
          "category": "Digital Painting",
          "format": "Photo",
          "title": "Melancholy",
          "posted_by": {
            "username": "phill"
          }
        }
      ]
    }
  ]
}
After hitting Send you’ll get your mutation results back:
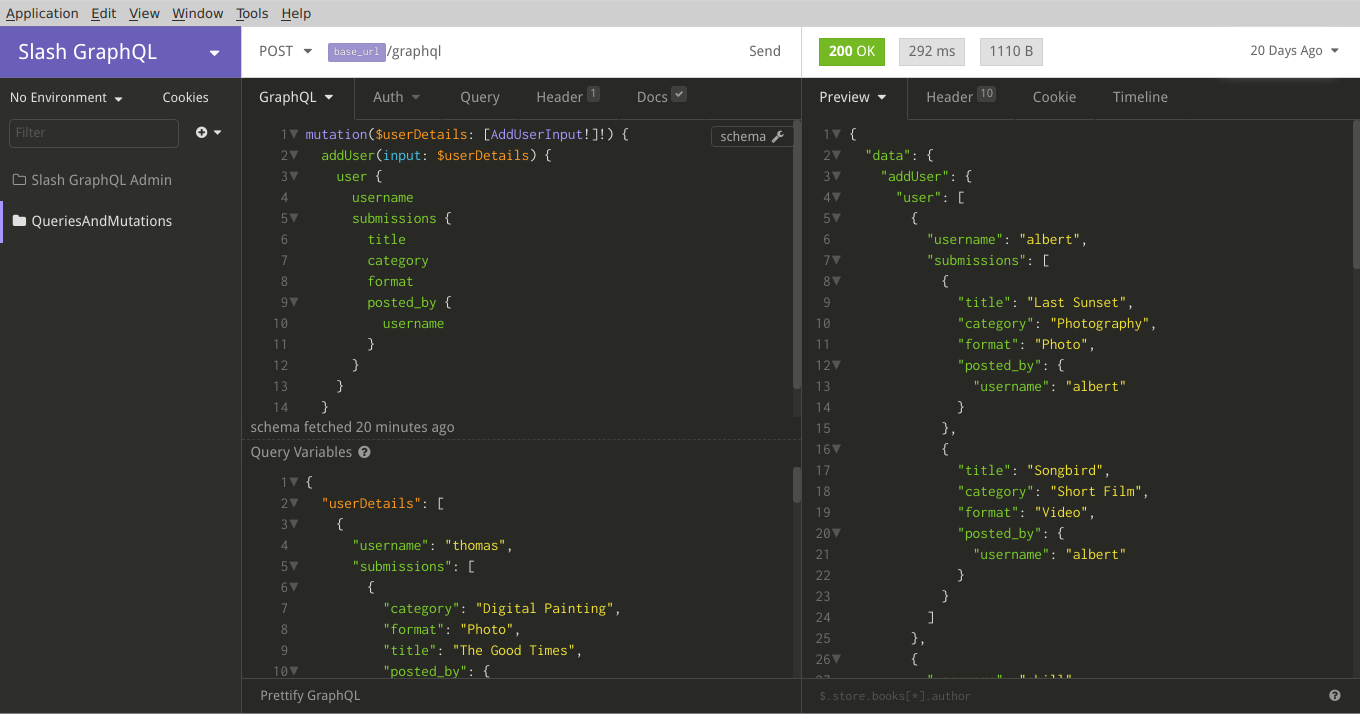
Cool! Now let’s do a query and fetch each user’s details along with their submissions:
query {
  queryUser {
    username
    id
    submissions {
      id
      category
      title
      format
    }
  }
}
{
  "data": {
    "queryUser": [
      {
        "username": "albert",
        "id": "0xf",
        "submissions": [
          {
            "id": "0x10",
            "category": "Photography",
            "title": "Last Sunset",
            "format": "Photo"
          },
          {
            "id": "0x16",
            "category": "Short Film",
            "title": "Songbird",
            "format": "Video"
          }
        ]
      },
      {
        "username": "phill",
        "id": "0x12",
        "submissions": [
          {
            "id": "0x11",
            "category": "Short Film",
            "title": "Secret Skies",
            "format": "Video"
          },
          {
            "id": "0x13",
            "category": "Digital Painting",
            "title": "Melancholy",
            "format": "Photo"
          }
        ]
      },
      {
        "username": "thomas",
        "id": "0x15",
        "submissions": [
          {
            "id": "0x14",
            "category": "Digital Painting",
            "title": "The Good Times",
            "format": "Photo"
          }
        ]
      }
    ]
  }
There’s a @search directive on the category field of Art so you can run a query to fetch submissions that belong to the Short Film category.
query {
  queryArt(filter: { category: {allofterms: "Short Film"}}) {
    category
    title
    posted_by {
      id
      username
    }
  }
}
This returns:
{
  "data": {
    "queryArt": [
      {
        "category": "Short Film",
        "title": "Secret Skies",
        "posted_by": {
          "id": "0x12",
          "username": "phill"
        }
      },
      {
        "category": "Short Film",
        "title": "Songbird",
        "posted_by": {
          "id": "0xf",
          "username": "albert"
        }
      }
    ]
  }
Nice, we got the two “Short Film” submissions back!
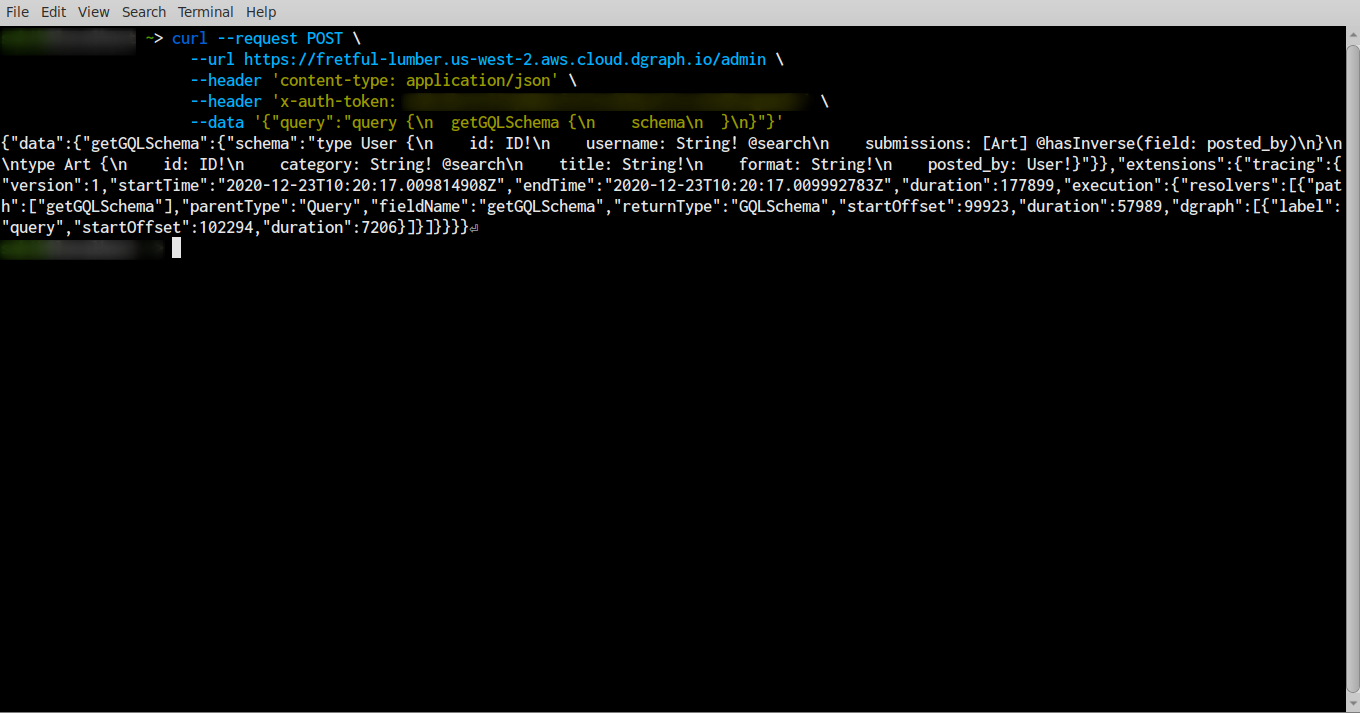
Insomnia supports code generation for several languages. For example, if you want to send those requests from the command line using curl, you can generate code for that using Insomnia.
Right-click on any request and select Copy as Curl.
Just paste and run it on your terminal; you’ll get the same response back:
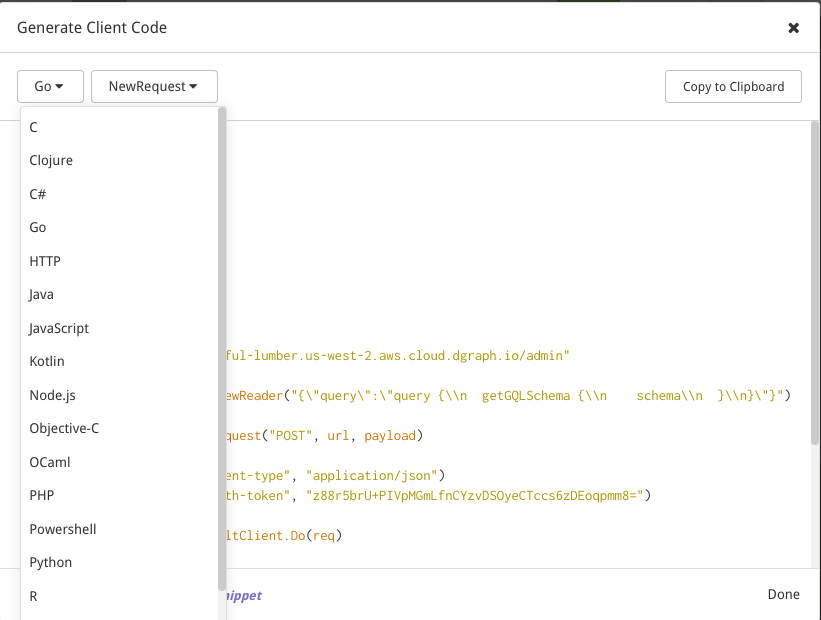
Depending on your preference or scenario, to generate code for any other language, select Generate Code instead and select your preferred language from the dropdown menu:
Like Postman, you can share your workspace with your team members that also enables syncing capabilities, but this requires a purchase. Other than that you can do an export of your workspace and share that.
To do an export, click on your Slash GraphQL workspace and select Import/Export:
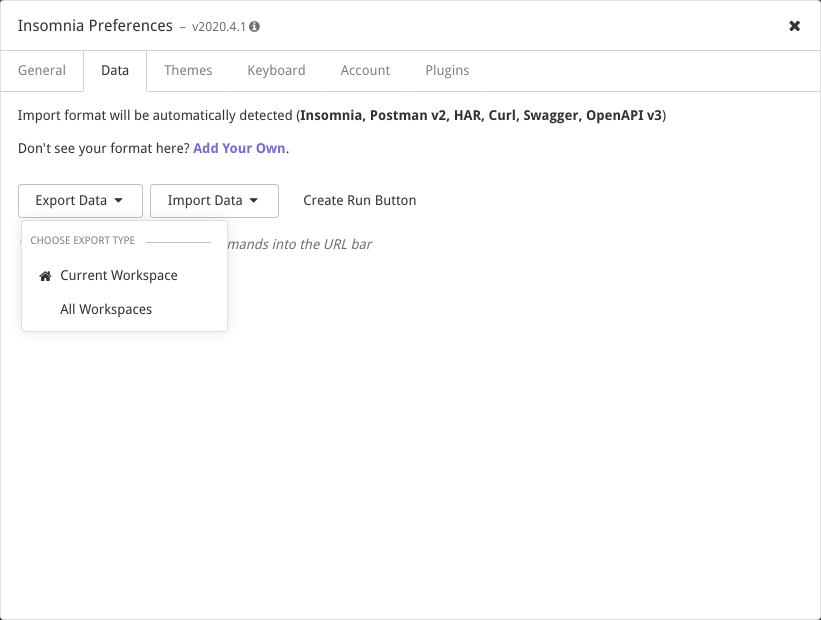
Select Current Workspace. You can choose which requests you want to be exported. Finally, select Export and then your desired export format (JSON, YAML, HAR).
The exported file can later be imported in Insomnia. It’s also possible to import a Postman’s exported collection as well, among some other formats. You can refer to the official docs here.
Let’s import Postman’s “Slash GraphQL Admin” collection inside Insomnia. From the Import/Export window select Import and then From File.
After importing you’ll get a confirmation popup and a new folder containing all requests of that collection.
This is quite helpful because it doesn’t matter whether or not your co-worker or some other party worked inside Postman because you can make the exported data work inside Insomnia as well.
In this article, you’ve learned how to use Insomnia to work with Slash GraphQL and perform administrative operations, as well as dispatching normal GraphQL requests, in an organized way using workspaces, environments, folders, and keeping minimal documentation of your work. You’ve also learned how to use import/exports for useful collaboration.
Tools like Insomnia and Postman can help you test and try out how to get around with GraphQL and manage deployments with Slash GraphQL. Soon you’ll want to develop applications on top of it. If you haven’t already, be sure to sign up for Slash GraphQL so that you can build GraphQL apps easily.
If you need pointers or a hands-on approach in the realm of GraphQL and app development, Dgraph Learn can give you a head start in building full-stack GraphQL applications on the Dgraph platform, using frontend solutions like React and Vue. It’s free and full of information and docs to help you along your learning journey. You can also dive into our docs section for more detailed reading on specific elements that interest you.
For further reading on the topics covered, here’s a collection of resources: