
Dgraph and Vector database - the best of two worlds
Dgraph and Knights Analytics discuss LLM Embeddings and Vector Databases for Augmented Information Retrie ...
Learn more

Update: On April 16th 2021, Slash GraphQL was officially renamed Dgraph Cloud. All other information below still applies.
The third in a 4-part series by community author Anthony Master.
Slash GraphQL’s authorization mechanism uses signed JWTs. Slash GraphQL can be configured to trust JWTs from whatever authentication service makes sense for your app. Providers like Auth0 and Firebase make sense for hosted authentication. In this post I’m going to show how to roll your own authentication service that even uses hashed passwords stored in Slash GraphQL.
Before we begin, you should have already completed part 1 and part 2 of this series. In those parts you will have built a schema and added authorization rules. If you want to continue without going through the whole series, you may copy the schema from the end of part 2. In this lesson we will learn how to generate JWTs and authenticate against our Dgraph Database.
In our schema we added a rule that no one can see the Pass type and that without having a JWT with the USERNAME and either the IS_LOGGED_IN attribute or a valid PASSWORD attribute then you can also not query the User type. So before we get any farther with Authenticating, we will need a JWT.
If you have not already, go ahead and spin up a new Dgraph Slash backend and upload your schema. If you need help on how to do this, you can follow the instructions found on Getting Started with Slash.
We keep talking about JWTs, but what exactly is a JWT? JWT stands for JSON Web Token, and as by the Auth0 team is “an open, industry standard RFC 7519 method for representing claims securely between two parties.” Basically it is just a way to transmit encoded data that can be verified against a private key as being valid and unchanged. For JWTs to be effective there are two major things to do.
Keep the private key PRIVATE! Sorry, didn’t mean to yell. But if the private key can be obtained then the entire authentication method is broken and anyone having the private key can generate valid JWTs. This is important when committing your code to any public repositories or posting it anywhere else online. When possible, use environmental variables for JWTs. We are going to break this rule in our examples to keep things more simplified. But I want you to know that this is of the utmost importance for maintaining any security in your application whatsoever.
Do not place any secret or otherwise identifying information in your JWT that you would not want anyone to see. This rule is a little harder to understand the reason why, until you see it. So let me explain in the following example.
Any data that is in the claim section of your JWT can be read by anybody with the JWT. This may not seem like a big deal, but think of old and expired JWTs (yes they expire which we will discuss later). Even though they cannot be used anymore because the data will not validate due to the expiration and Dgraph will give you an error message, the data contained inside of them is still readable. Here is a token that is expired:
eyJhbGciOiJIUzI1NiIsInR5cCI6IkpXVCJ9.eyJzdWIiOiJhdXRoZW50aWNhdGUiLCJodHRwczovL3lvdXJkb21haW4uY29tL2p3dC9jbGFpbXMiOnsiVVNFUk5BTUUiOiJhZG1pbiIsIlBBU1NXT1JEIjoiRGdyQHBoU2xAJGgifSwiaWF0IjoxNTE2MjM5MDIyLCJpc3N1ZXIiOiJhdXRoZW50aWNhdGlvbiBzY3JpcHQiLCJleHAiOjE1MTYyMzkwMjJ9.u3XtYqV9372-pcUQ-6-p5XGPTNNDLE042B2Of6IdQJQ
If you copy this and paste it in as a token at https://jwt.io/ you will be able to read all of the data. Anybody could take a token and read the data like this. So if there was any data in here such as a password (which there was) then it would be plain and readable. That is something we do NOT want to expose to the world. So the bottom line is keep any restricted data and nonPublic information out of your JWTs. I would go as far as recommending to never put a user’s email address in a JWT.
So if we cannot put any data in a JWT then how are we supposed to use them to authenticate against a database? Herein lies the exception to the rule. If a JWT is protected in an end to end encryption such as https, then the JWT is protected under most circumstances. If you are not using a SSL on your Dgraph config (which Slash uses by default) then I would encourage you to set that up before continuing. We will be passing our JWT containing the hashed password only on the server side, and then generate a different JWT that we provide back to the user for regular authorization use communicating to the Dgraph graphql endpoint. I would never supply a JWT to a client that contains any passwords (even hashed passwords).
So what do we need to generate a JWT that we can use for authentication? We need a claims property (referred to by Dgraph as Namespace) which we defined in Part 2 as “https://yourdomain.com/jwt/claims”, we need a private key which we defined already as “YourSecretKey” and we need the data to authenticate. Which for our first case will be just a simple USERROLE. Go to https://jwt.io/ and paste in your Secret Key into the Verify Signature field and then paste the following into the Payload field:
{
  "sub": "admin",
  "https://yourdomain.com/jwt/claims": {
    "USERROLE": "ADMINISTRATOR"
  },
  "iat": 1516239022,
  "issuer": "authentication script",
  "exp": 4102444799
}
You should have generated the following JWT (if you are using the same Secret Key). Note that I have set the expiration to 12/31/2099 23:59:59 GMT. We should not usually generate keys that are alive for so long.
eyJhbGciOiJIUzI1NiIsInR5cCI6IkpXVCJ9.eyJzdWIiOiJhZG1pbiIsImh0dHBzOi8veW91cmRvbWFpbi5jb20vand0L2NsYWltcyI6eyJVU0VSUk9MRSI6IkFETUlOSVNUUkFUT1IifSwiaWF0IjoxNTE2MjM5MDIyLCJpc3N1ZXIiOiJhdXRoZW50aWNhdGlvbiBzY3JpcHQiLCJleHAiOjQxMDI0NDQ3OTl9.KPGIVJWVT7Fc9KUwL6r9f3-Zh0FC27AuB7DBr9cOkqQ
This is a JWT that will suffice any of the { $USERROLE: { eq: \"ADMINISTRATOR\"} } auth rules that we put in place in our schema.
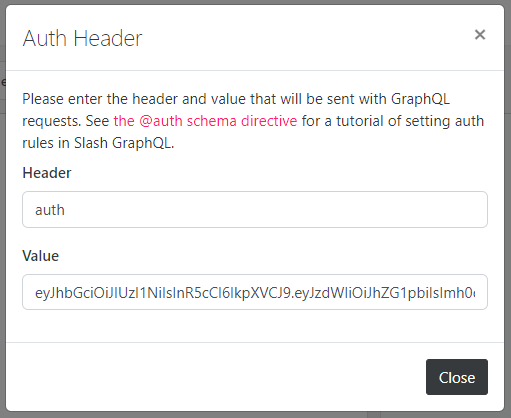
Let’s put this in a header format to send over to Dgraph using any GraphQL client that supports headers. Note that we are using the “auth” header as we defined it in our Dgraph.Authorization setup in Part 2.
{"auth":"eyJhbGciOiJIUzI1NiIsInR5cCI6IkpXVCJ9.eyJzdWIiOiJhZG1pbiIsImh0dHBzOi8veW91cmRvbWFpbi5jb20vand0L2NsYWltcyI6eyJVU0VSUk9MRSI6IkFETUlOSVNUUkFUT1IifSwiaWF0IjoxNTE2MjM5MDIyLCJpc3N1ZXIiOiJhdXRoZW50aWNhdGlvbiBzY3JpcHQiLCJleHAiOjQxMDI0NDQ3OTl9.KPGIVJWVT7Fc9KUwL6r9f3-Zh0FC27AuB7DBr9cOkqQ"}
If you are following along in Slash, you can put it in via the GUI using the Auth Header Form:
There is one more step before we look into the script that will authenticate a User and generate a JWT, we must have a user with a password. Let me help you out with the following mutation:
mutation CreateUserWithPass {
  addUser(input: [{username: "admin", hasPassword: {
    password: "6dd95677e22182a619368a4e8aa520aa"
  }, isType: ADMIN, isContact: {name: "Your Name", isType: PERSON}}]) {
    numUids
    user {
      username
    }
  }
}
The password we are using here is a md5 hash of “Dgr@phSl@$h”. You can easily generate md5 hashes at http://www.md5.cz/
NOTE: For security reasons, I recommend using a stronger hashing mechanism than md5. We are using md5 here for simplicity.
Now we have a user to authenticate against, let’s get into the actual authentication script. As I have already taken more of your time than I initially planned, let me give you a quick breakdown and then I will add comments in the script to add extra explanation where due.
This authentication script should:
We are using javascript for our language of choice and npm for our package management. We will host this script as a netlify function. You could use lambda or host it yourself. The key is to keep this script a server side script. For ease of use we will be using the following npm packages:
There are other packages that could be used and many other programming languages that this script could be written in. The algorithm is the important part to follow.
Remember from last time that we’ve built the password checking into the Slash GraphQL instance, so the query here needs to supply the username and password in the request and Slash GraphQL will only respond with the user’s data if the password matches that stored for the user.
import jwt from 'jsonwebtoken'
import md5 from 'md5' // FIXME: do better hashing instead of md5
import { v4 as uuid } from 'uuid';
import fetch from "node-fetch"

/** FIXME
 * Change this key and pull it from env variable.
 * This must match what you use in your Dgraph Schema in # Dgraph.Authorization VerificationKey
 */
// NOTE: Keep this super secret and out of any and all public places including github repositories
const key = "YourSecretPassHere"

/** FIXME
 * Change this to your payload claims property. Normally a url but not mandatory.
 * This must match what you use in your Dgraph Schema in # Dgraph.Authorization Namespace
 */
const claims = "https://yourDomain.com/jwt/claims" // NOTE: This does NOT need to point to any actual routing.

// FIXME: Your graphql endpoint
const endpoint = "https://yourDomain.com/graphql" // NOTE: I would not attempt this until you have enabled SSL on your server.

const issuer = "yourDomain" // NOTE: This can be anything you want for most circumstances.

// define how many days before the user token expired.
const aliveDays = 30

// CORS headers
const headers = {
  "Access-Control-Allow-Origin": "*", // FIXME: lock this down to whitelisted domains only.
  "Access-Control-Allow-Methods": "OPTIONS, POST",
  "Access-Control-Allow-Headers": "content-type",
  "Allow": "OPTIONS, POST"
}

exports.handler = async (event, context) => {
  // Only allow POST
  if (event.httpMethod === "OPTIONS") {
    return { statusCode: 200, headers }
  }
  if (event.httpMethod !== "POST") {
    return { statusCode: 405, headers, body: "Method Not Allowed" }
  }

  // get the username and pass variables sent to this request in the body.
  const params = JSON.parse(event.body)
  const username = params.username || null
  // FIXME: do better hashing instead of md5
  const pass = params.pass ? md5(params.pass) : null

  /** NOTE
   * DO NOT put a password in user received JWT.
   * Think of everything in the JWT payload as user readable data to the client.
   */
  // Define AUTh_TOKEN used by the script to query for a valid user.
  const AUTH_TOKEN = jwt.sign({
    [claims]: {
      "PASSWORD": pass,
      "USERNAME": username,
    }
  }, key, {
    // NOTE: this can be shortened most likely to a minute or even less.
    expiresIn: "10 minute",
    // This can be anything here.
    issuer: "authentication script",
    jwtid: uuid(),
    subject: "authenticate"
  })

  return fetch(endpoint, {
    headers: {
      auth: AUTH_TOKEN,
      'Content-Type': 'application/json'
    },
    method: "POST",
    body: JSON.stringify({
      /** FIXME
       * Put your query here to find a valid user and get their data.
       * We are comparing the password through JWT @auth rules not in any filter of the query
       */
      query: `
        query ($username: String!){
          getUser(username:$username) {
            username
            isType
            isContact { id name }
          }
        }
      `,
      variables: { "username": username }
    })
  })
    // prepares the results to be parsed
    .then(body => body.json())
    // do something with the results
    .then(userdata => {
      // NOTE: Here we are looking to find if the query responded with a username
      /** TODO
       * If ES6 is supported this can be shortened to the following:
       * if (userdata?.getUser?.username) { ... }
       */
      if (
        userdata &&
        userdata.data &&
        userdata.data.getUser &&
        userdata.data.getUser.username
      ) {
        // create a data object we will use to build our claims
        const data = {}
        const getUser = userdata.data.getUser
        // assign attributes to the data object from the user data received.
        data.USERNAME = getUser.username
        data.ISCONTACT = getUser.isContact.id
        let ADMIN_TOKEN = null
        /** NOTE
         * If the user is a super admin I am providing back two separate tokens,
         *  one that will act as a regular user, and one that will give them super admin privileges.
         * This allows a super admin to only enact special privileges when needed.
         */
        if (getUser.isType === "ADMIN") {
          ADMIN_TOKEN = jwt.sign({
            [claims]: { ...data, USERROLE: "ADMINISTRATOR" }
          }, key, {
            expiresIn: `${aliveDays} days`,
            issuer,
            jwtid: uuid(),
            subject: userdata.data.getUser.username
          })
        }
        const USER_TOKEN = jwt.sign({
          [claims]: { ...data, USERROLE: "USER" }
        }, key, {
          expiresIn: `${aliveDays} days`,
          issuer,
          jwtid: uuid(),
          subject: userdata.data.getUser.username
        })
        // NOTE: I am returning a readable string back to the request making it clear how long the JWT is valid for.
        const expires = new Date()
        expires.setDate(expires.getDate() + aliveDays)
        // create a body to be used in the response back to the request
        const body = { token: USER_TOKEN, username: data.USERNAME, expires }
        // if the admin token was created, add it to the body to be sent back
        if (ADMIN_TOKEN) body.admin = ADMIN_TOKEN
        return {
          headers,
          statusCode: 200,
          body: JSON.stringify(body)
        }
      }
      // TODO: this can probably be enhanced some to provide a statusCode 200 with a nice message about invalid username/pass
      return {
        statusCode: 401,
        headers,
        body: JSON.stringify({ error: "Invalid" })
      }
    })
    .catch(error => ({
      // TODO: this can probably be enhanced some to provide a statusCode 200 with better error handling.
      statusCode: error.statusCode || 500,
      headers,
      body: JSON.stringify({ error: error || 'Server Error' })
    }))
}
To use this script, upload it on a server somewhere such as netlify or lambda and then sent a POST request to it with the following JSON body (I use Insomnia for doing this):
{"username":"admin","pass":"Dgr@phSl@$h"}
And you should receive the following reply:
{"token":"...","username":"admin","admin":"...","expires":"..."}
The “token” JWT is what you can use now to make requests with a regular user role, and the “admin” token is what you can do to make requests with escalated privileges according to the auth rules we defined.
Thank you for following along so far. In the next and final part of this series we will bring it all together by utilizing the custom function above hosted online in a custom Mutation within our Dgraph GraphQL endpoint. This will allow us to authenticate and generate JWTs without ever leaving our GraphQL endpoint.
Huge thanks from Dgraph to Anthony for coming forward to write some great blogs. If you are using Slash GraphQL or Dgraph and would like to write a community post, reach out to Michael, Zhenni or Apoorv in our discuss community